 Biostatistics | Center for Clinical and Translational Science
Data Resolution Workflow
Use the Data Resolution Workflow to flag, resolve, and document data issues or discrepancies.
Use case: A member of your team might notice a very high value for a patient’s clinical lab test. They can open a query indicating that the value needs review.
- If the value is incorrect–for example, the result of a typo–it can be corrected in the patient’s record and the query can be marked as resolved.
- If the value is correct, it should be left as-is. The query can be closed with a note that the value has been validated.
See a video overview of the Data Resolution Workflow.
First, enable the module by going to Project Setup > Additional customizations.
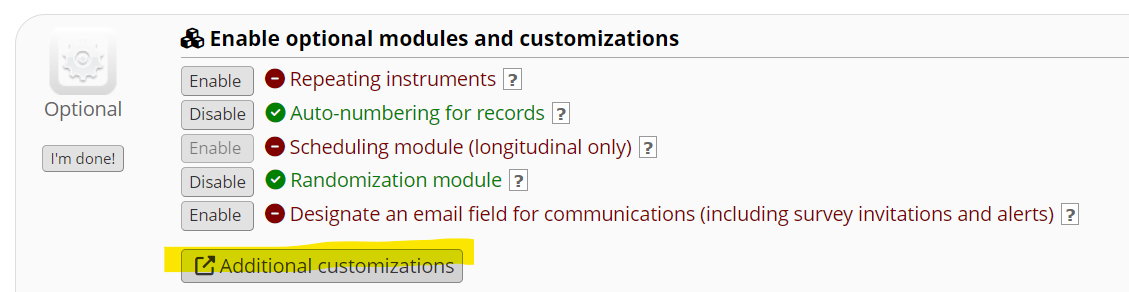
Enable the Data Resolution Workflow.

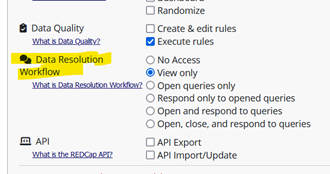
Then, you must grant access to the workflow for the correct users on the User Rights page.
Open a data entry form for an existing record. Notice the gray speech bubble icon next to each field.
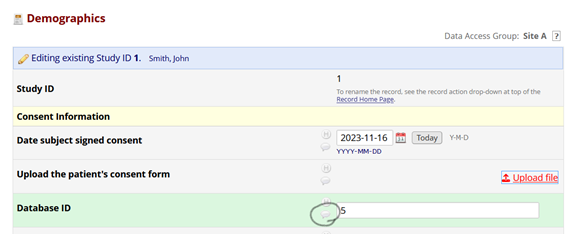
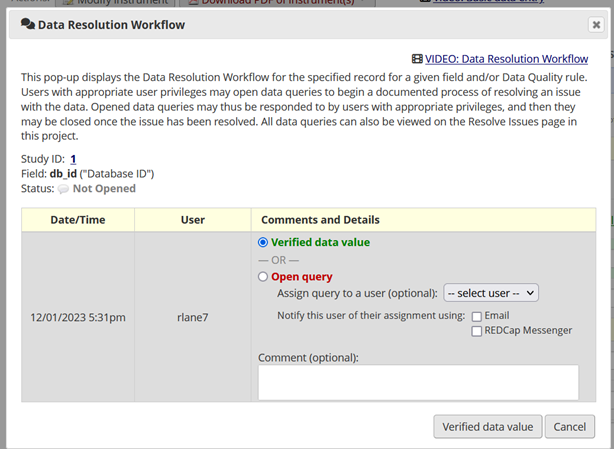
Clicking that icon will open a window where you can either verify the data value or flag it as needing review. If a value needs review, you can assign the task to another user and send that person an alert.
Open the Data Quality module and run one or more rules to check for incorrect or invalid values. If there are any issues, click “View” to see the list.
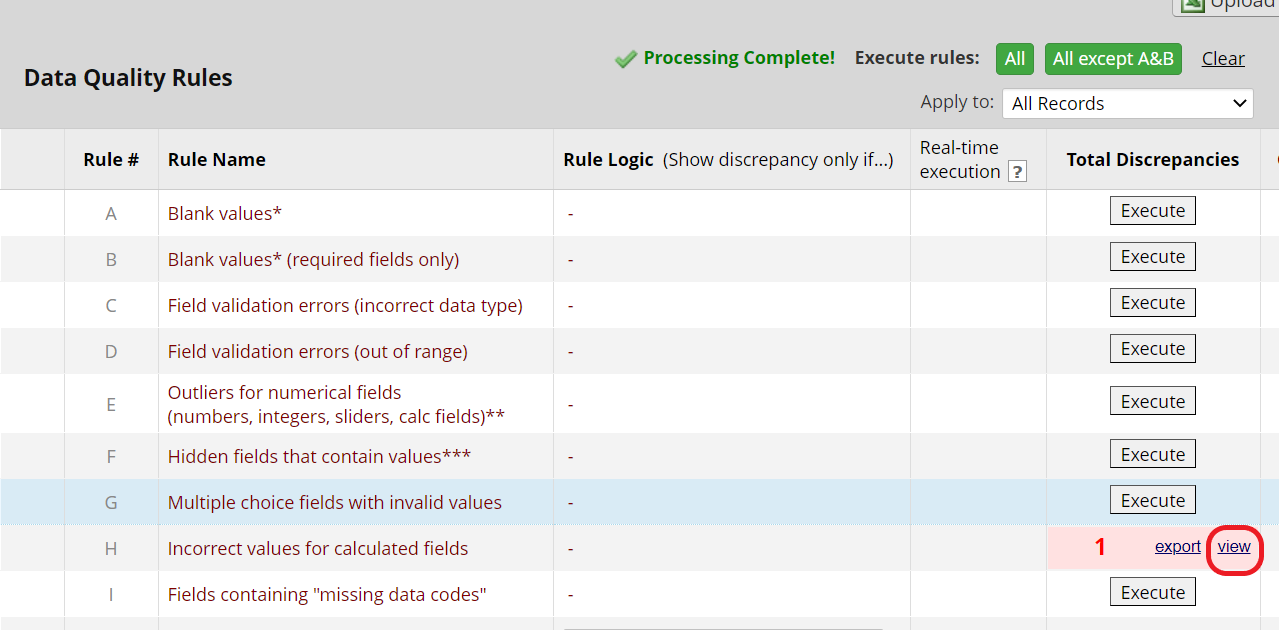
You will see a column titled “Resolve issue” in the popup window. Click the button beside any issue to review it and either verify it or open a query.

If a query has been opened about a value, a red icon will appear next to that value on the data collection form. Click that icon to view the details.
![]()
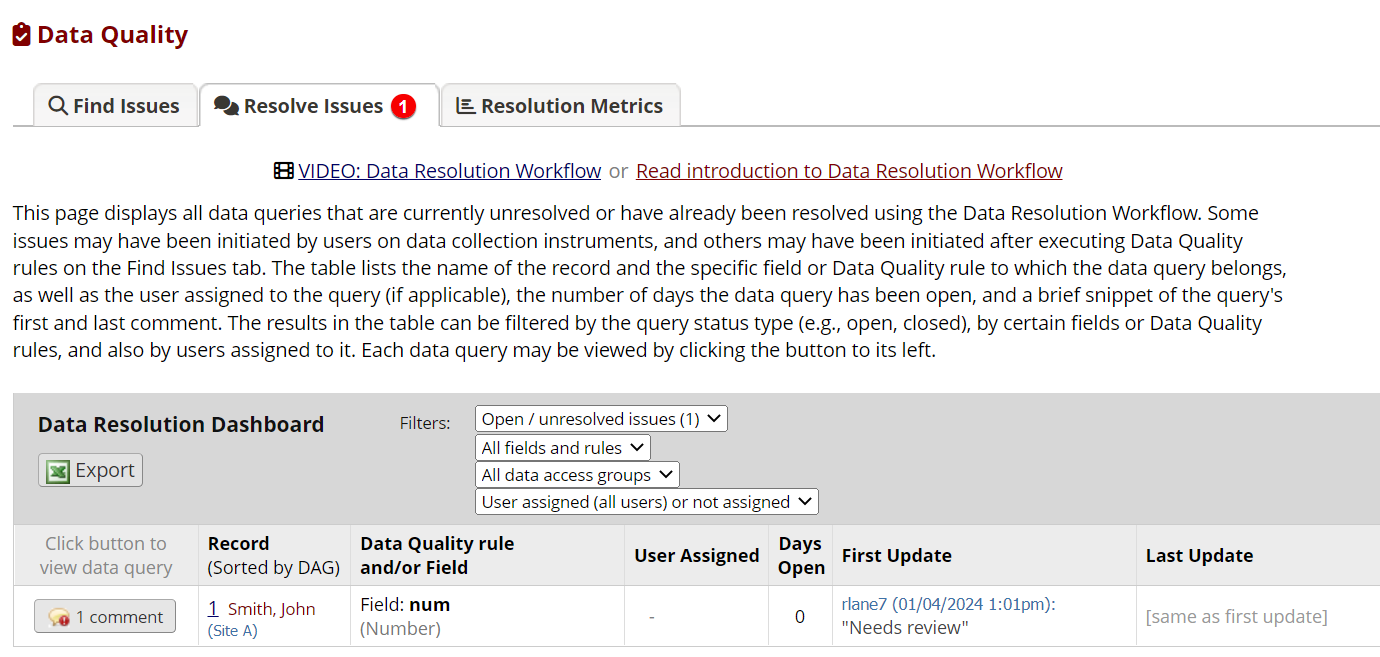
All queries will also appear on the Resolve Issues tab of the Data Quality module. Click the button beside an issue to view the details.
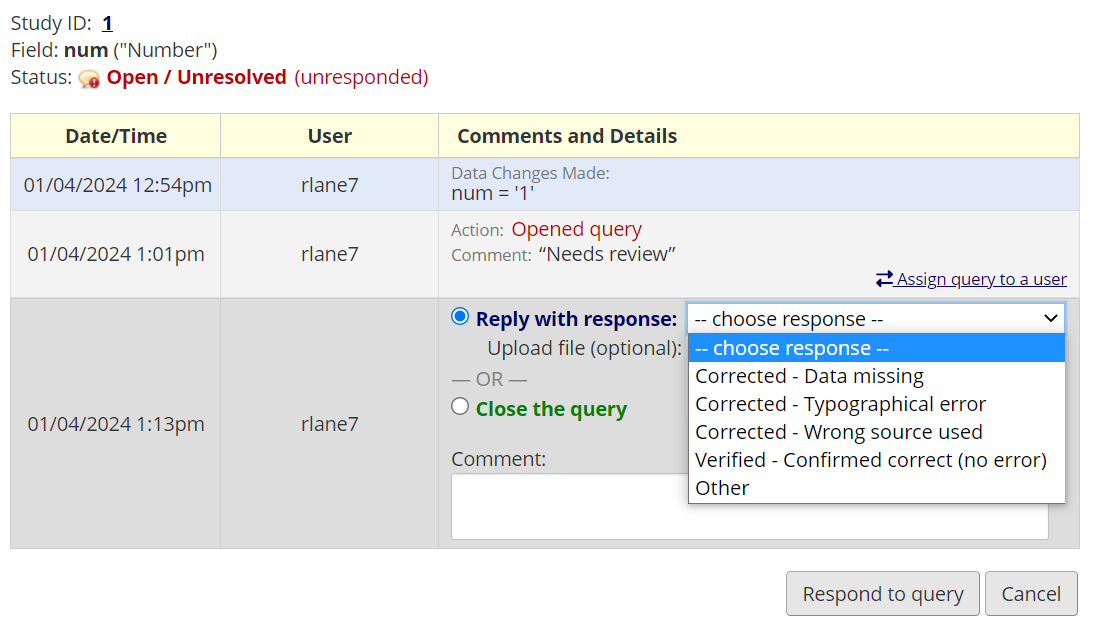
After you have investigated the status of a value, you may need to change it in a record. Alternatively, you may discover that the existing value is correct. Either way, you can respond to the query with a comment to capture that information and then close the query or send it to someone for further review.
Once a field has been verified, a green checkmark will appear next to it on the data entry form.

You can view or download a list of open, verified, and resolved issues on the Resolve Issues tab. The Resolution Metrics page includes some statistics about issues that have been opened and resolved.
