 Biostatistics | Center for Clinical and Translational Science
e-Consent
The e-Consent framework in REDCap is a module that helps you obtain participant consent electronically with a REDCap survey.
IRB approval must be obtained before using REDCap e-Consent. Get IRB approval after reviewing the regulatory component. If you need any regulatory support related to the e-Consent process, submit a service request to CCTS: https://research-ally.ccts.uic.edu/
- The new e-Consent Framework module was added to REDCap in July 2024.
- The e-Consent Framework setup was moved from Survey Settings to a separate page within the Online Designer.
- Your consent document can be added in e-Consent settings with version control.
- Define PDF settings through PDF Snapshot instead of the old PDF auto-archive option in Survey Settings.
- PDF Snapshot can store the translated version when Multi-Language Management (MLM) is set up.
- Users can customize the PDF Snapshot file name.
- Data Access Groups (DAGs) are supported if you have multiple consents for different sites or groups.
The e-Consent Framework adds two things to the typical survey-taking process.
- Before a participant completes the survey, an extra certification page is added that displays an in-line PDF copy of their survey responses. The participant will be asked to confirm that all information in the document is correct. Once they confirm all is correct, the survey will be marked as complete. The survey will not be considered complete until they fulfill the certification step.
- Upon completion of the survey, a static copy of the response will be stored in the project’s File Repository in the form of a consent-specific PDF. The consent-specific PDF will have the values of the e-Consent Framework Options inserted at the bottom of each page. These values (name, date of birth, etc.) are added to the PDF as extra documentation of the identity of the person who is consenting. (Adapted from REDCap)
Patients/subjects can “sign” their consents by typing in their name or by utilizing REDCap’s “Signature” field type (i.e., ‘wet signature’) on the survey. One might also assign PIN numbers to prospective participants to aid in the signature process. Please note that the signature process will NOT be implemented by REDCap automatically, so it is your responsibility as a survey administrator to construct your survey using one of the methods above in order for the signature to get captured appropriately. (Copied from REDCap)
You can create a new REDCap project only used for your e-Consent instrument, or you can add it to an existing project containing other forms (e.g., prescreening and outcome measurements) linked to each participant’s record ID. In either case, to utilize the e-Consent features, follow the steps below.
Surveys must be enabled in Project Setup to use e-Consent features.
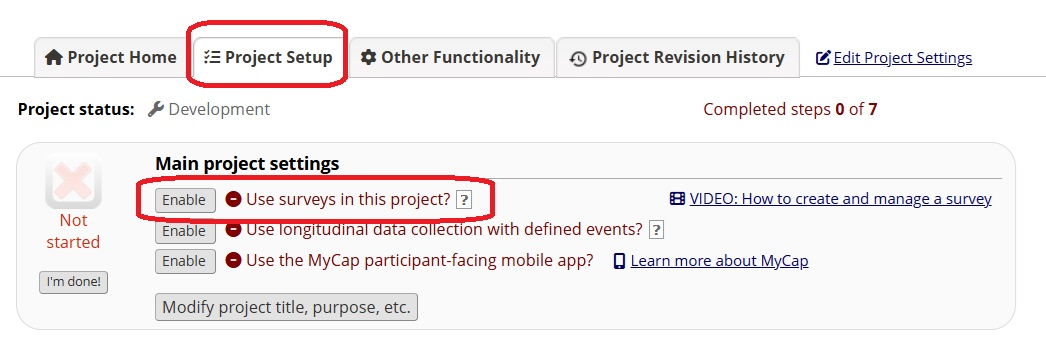
Figure 1: Project-level Survey setting
Add fields for the consent form. These might include descriptive fields to explain the consent process or display a PDF version of the document; text fields for initials, consent date, and participant’s date of birth with date validation; yes/no fields for agreement; and a signature field. For a simple project, you can upload the PDF consent document as an inline image in a descriptive text field. For more complex setups, use the eConsent Framework Settings to add multiple forms for different Data Access Groups, multi-language module (MLM) settings, and document versions.
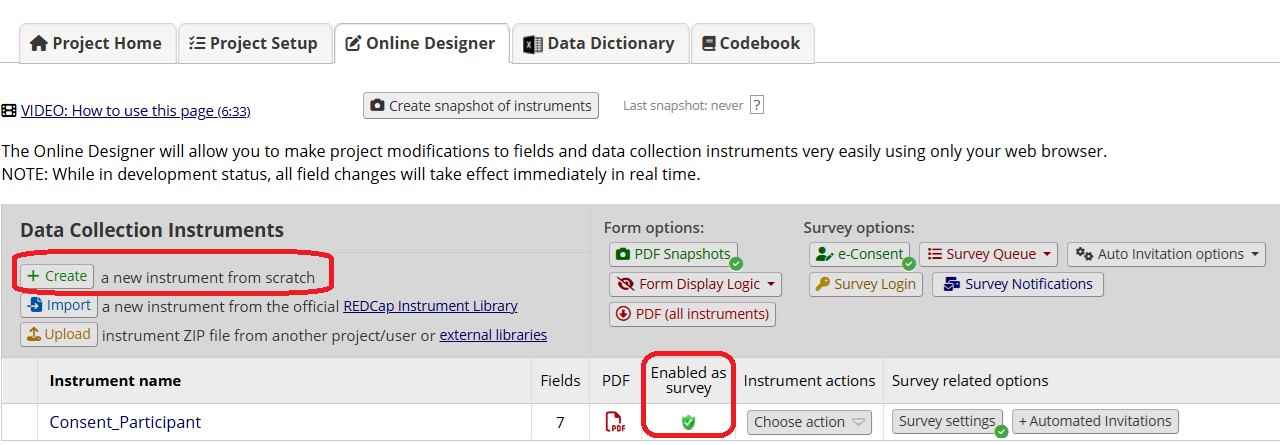
Figure 2: Enable Survey in Online Designer
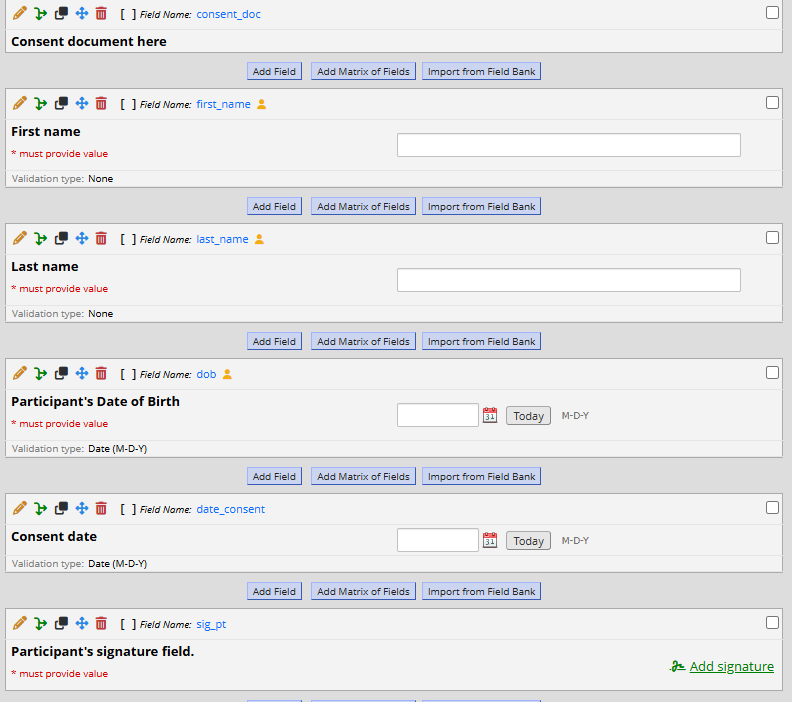
Figure 3: Example Fields for the Consent Survey Instrument
Click e-Consent in the Online Designer to start the setup process.
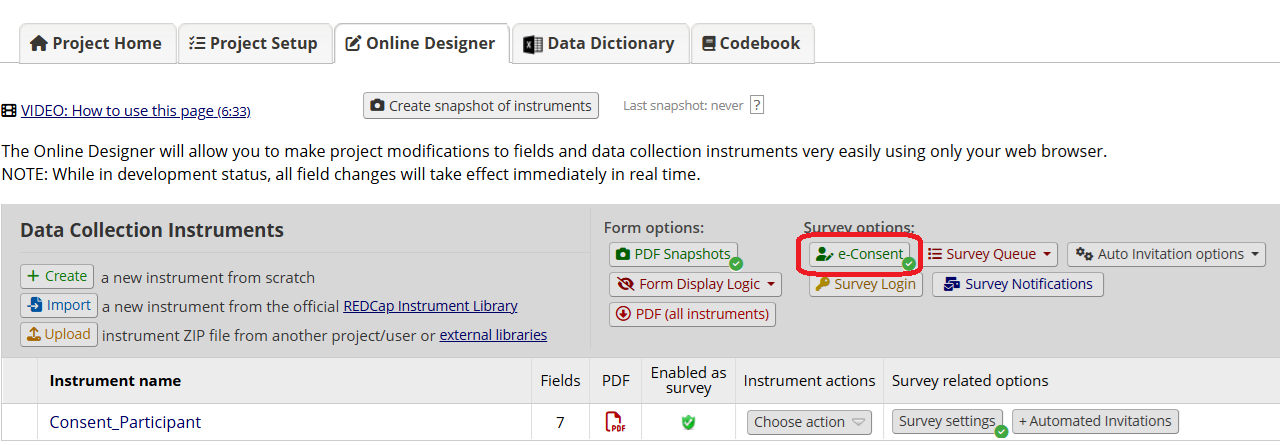
Figure 4: Set up eConsent options
Then click Enable the e-Consent Framework for a survey to select the instrument.
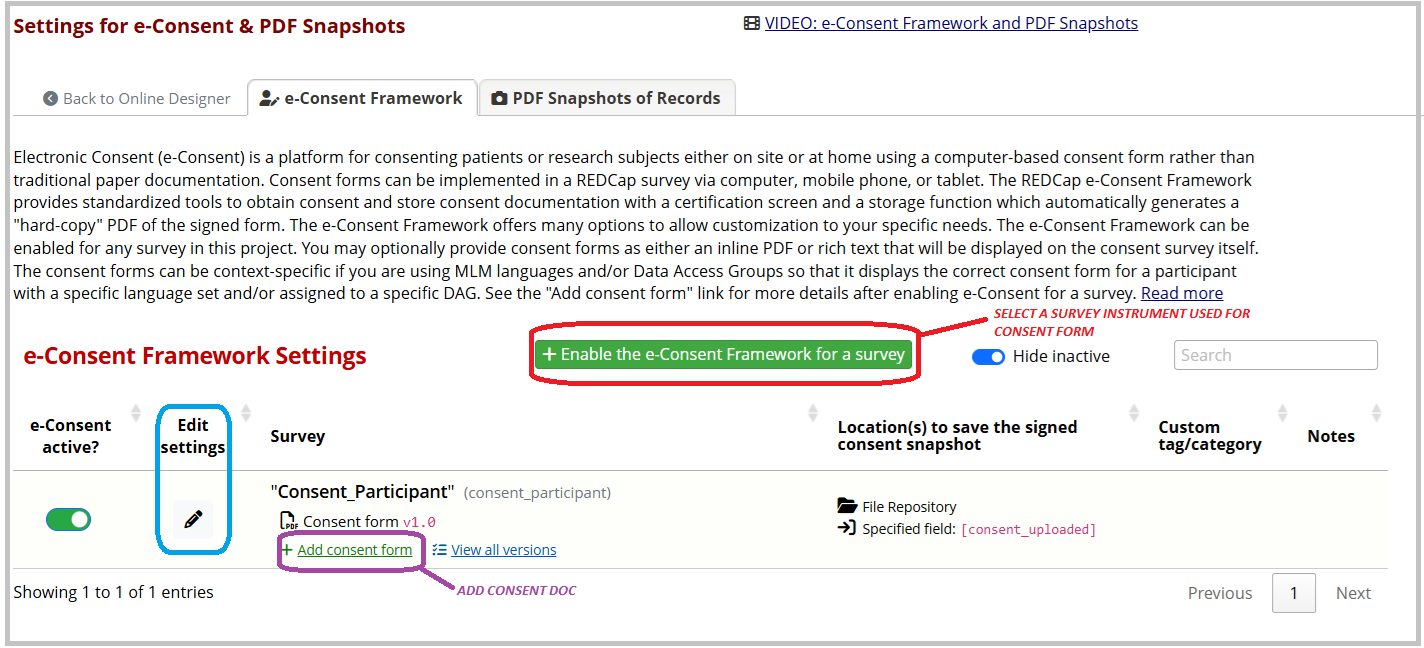
Figure 5: Settings for eConsent
Add the consent document by clicking Add consent form (unless it’s already included in a descriptive field within the instrument). You can either type in the consent content using Rich Text or upload the PDF form using Inline PDF option. Since there are some limitations with the Rich Text option, it is recommended to choose the Inline PDF. When you add the document, you must provide the consent form version and select the descriptive field that will serve as the location of the consent document. For multiple consent forms, you must select the same descriptive field.
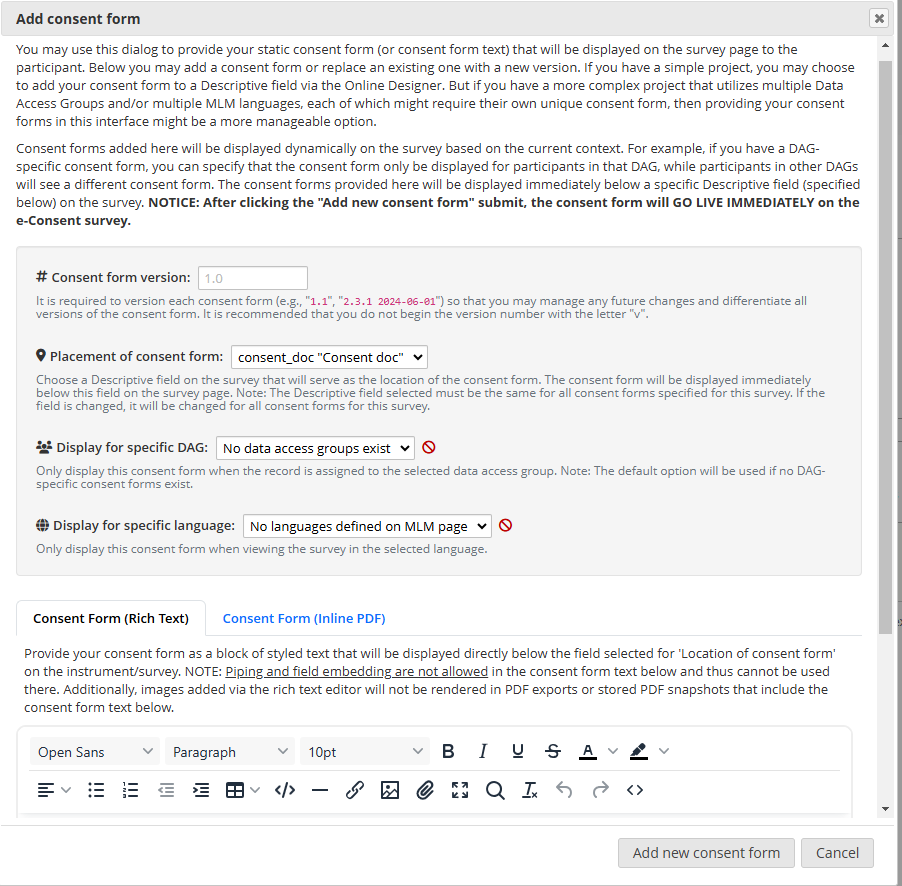
Figure 6: Add Consent Form
The added consent form shows on the data entry form or the survey view, but not on the instrument in Online Designer.

Figure 7: Added Consent Form on the Survey
By clicking Edit Settings in e-Consent you can modify the following settings.
- Primary settings: Allow consent participant’s name to be edited or not.
- Additional settings: Designate the Date of Birth field and customize the PDF footer and header
- Decide whether to erase the signature when “Previous Page” is clicked.
- Set the location(s) to save the signed consent snapshot other than the default File Repository.
- Customize the Snapshot file name to include or exclude the record id or other info.
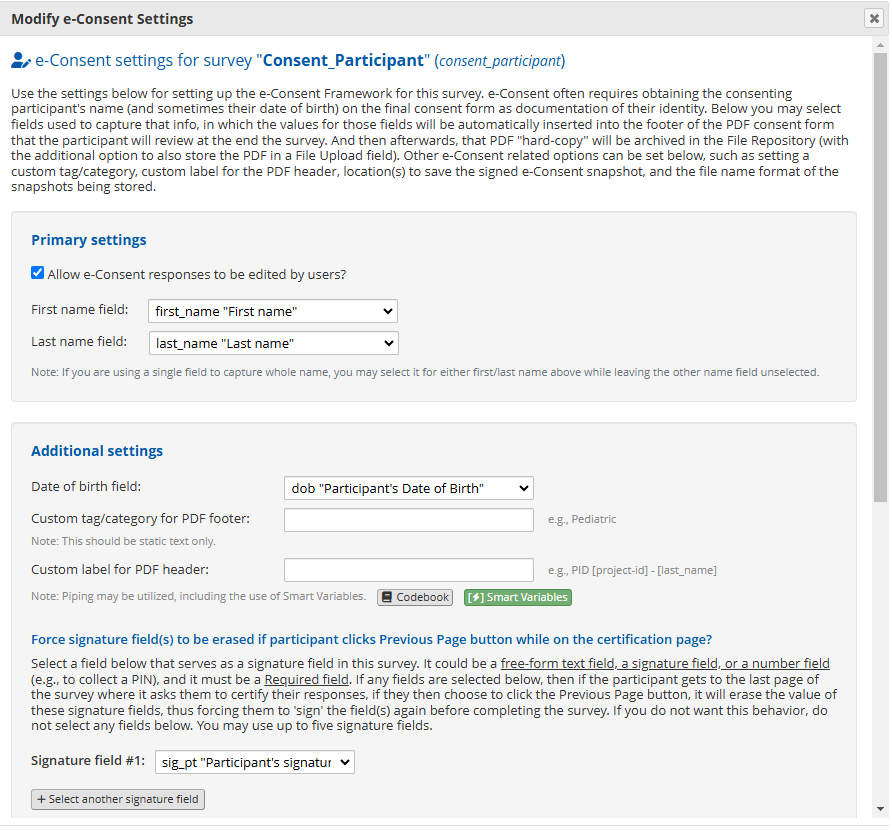
Figure 8: Modify e-Consent Settings
The REDCap developer describes PDF Snapshot as “a REDCap-generated PDF file of a single instrument/survey, multiple instruments, or all the instruments of a given record. PDF Snapshots can be triggered when 1) a survey is completed, or 2) when specified conditional logic evaluates as True. When triggered, snapshots can be stored in the PDF Snapshot Archive folder in the File Repository and/or stored in a specified File Upload field. You may create as many triggers as you wish for capturing snapshots”.
PDF snapshots are auto-generated once the e-Consent is enabled, so you don’t need to set it up separately.
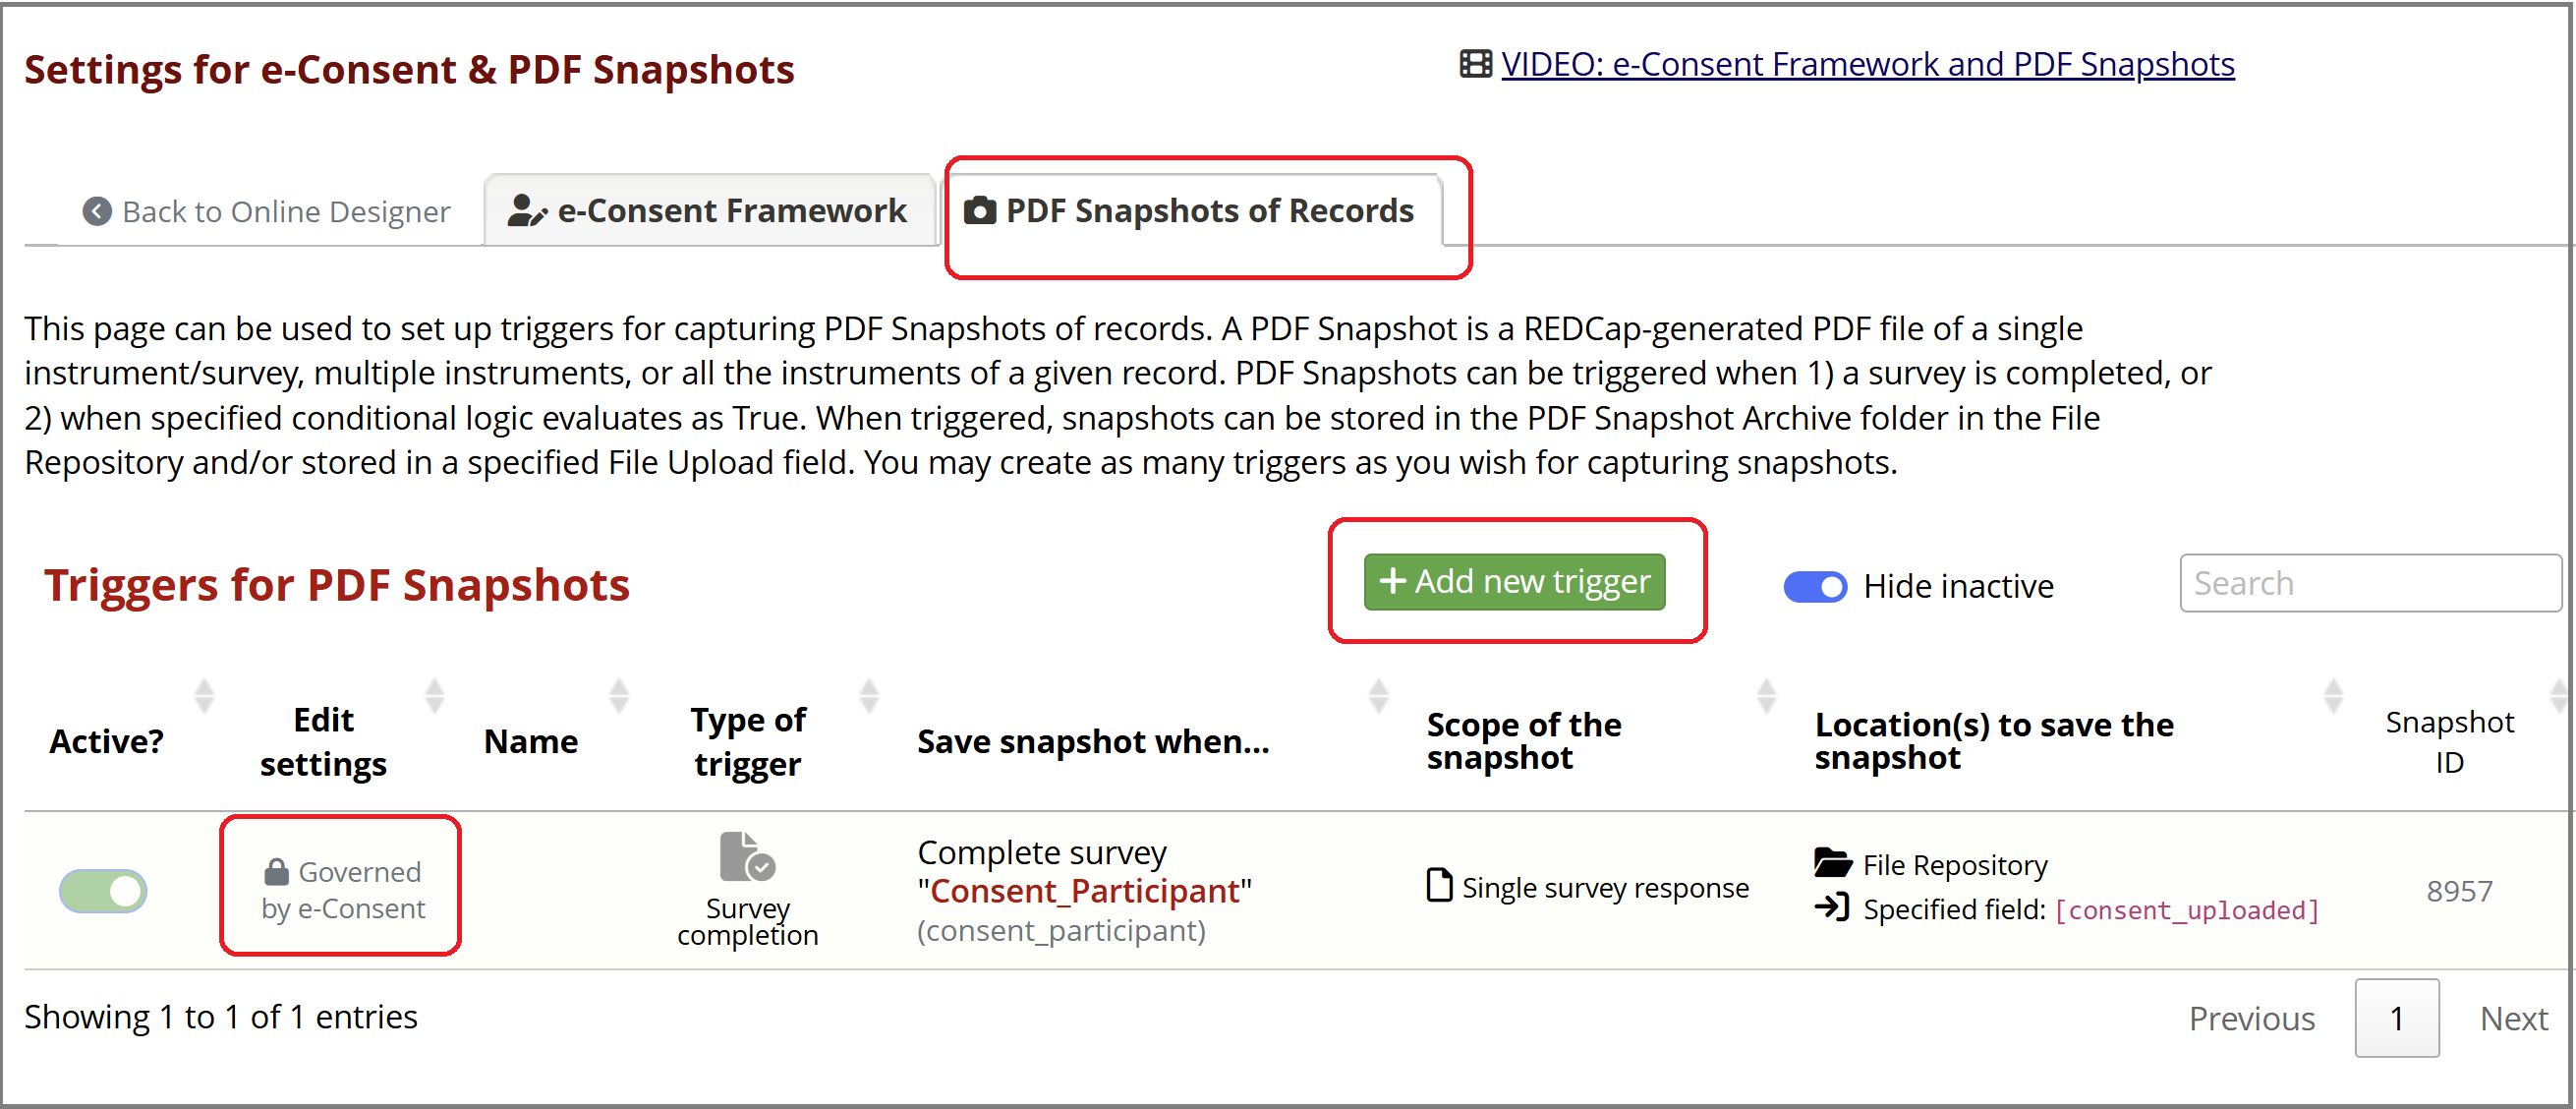
Figure 9: PDF Snapshots of Records
In addition to the default snapshots archived by e-Consent Settings, you may add new triggers to save PDF files for different conditions and locations. You can choose to save the PDF to the File Repository or to a File Upload field in another instrument within the project.
A consent form saved or edited on a data entry form in Add/Edit Records will NOT be auto-saved in the File Repository. To save the edited consent form by staff automatically, you may add one or more new triggers.
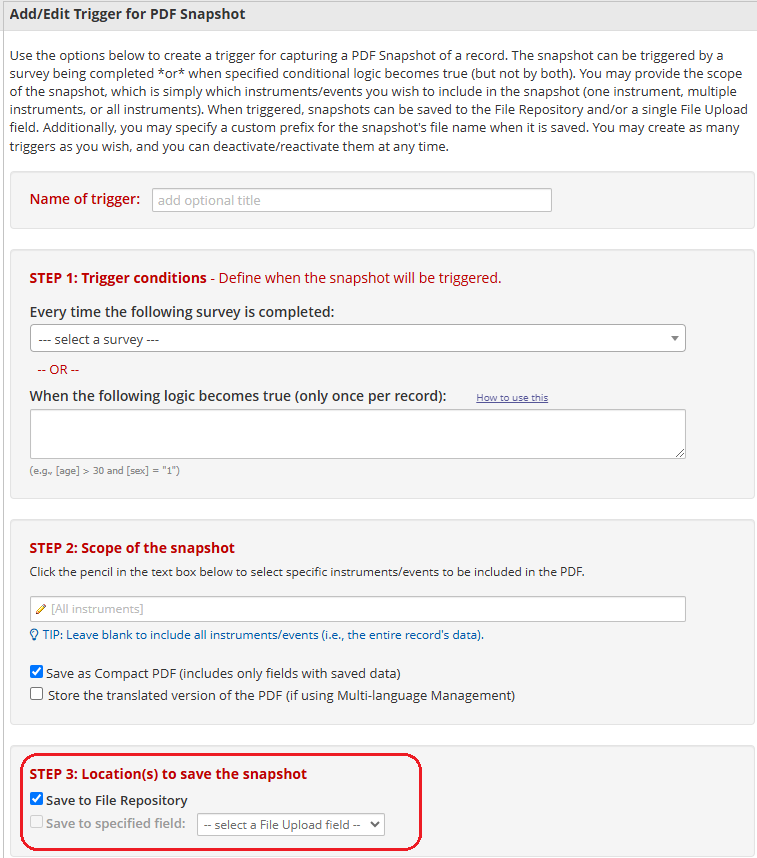
(#fig:snapshot_new)Add/edit Snapshot Triggers
If you checked “Save to File Repository”, when a consent survey form is submitted by a participant, the PDF file will be auto-archived in a File Repository folder named “PDF Snapshot Archive.”
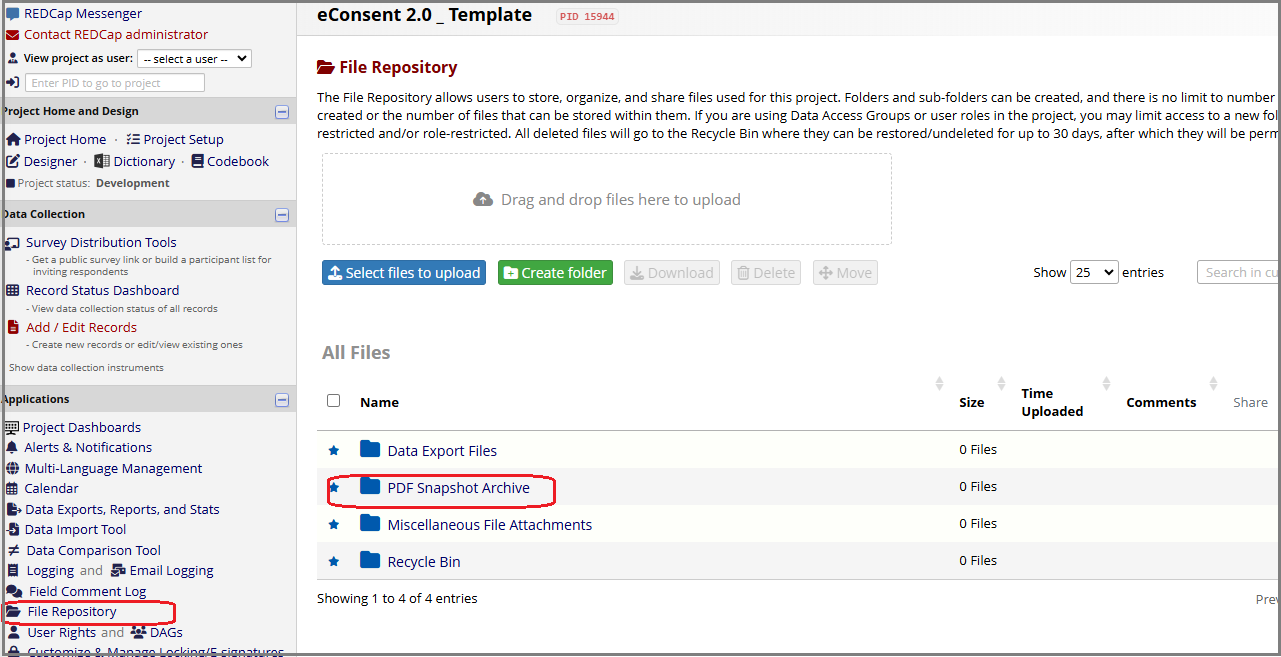
(#fig:snapshot_f)PDF Snapshot Archive in File Repository
The saved PDF will have a time-stamped, customizable file name and the consent document’s version as assigned in e-Consent settings.
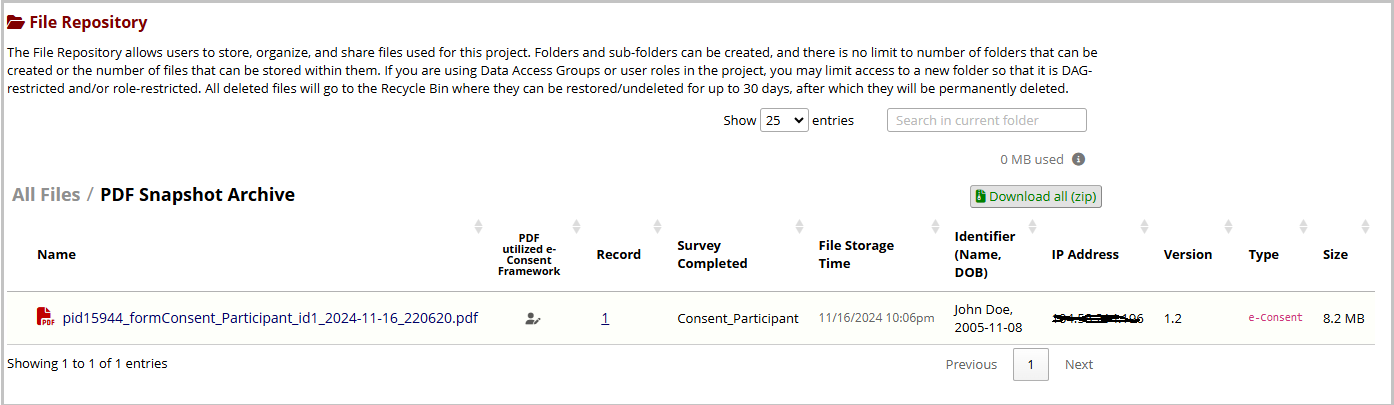
(#fig:snapshot_i)PDF Snapshot Example
There are different options for sharing the e-Consent survey with participants.
A public survey link is only available when the consent survey is the first instrument in your REDCap project. This option is appropriate when the link needs to be shared with multiple people, for example in an email message or on a public website. Anyone who clicks the link can access the consent form and create a new record in your REDCap project. Note that a single person could access the survey multiple times using the same link.
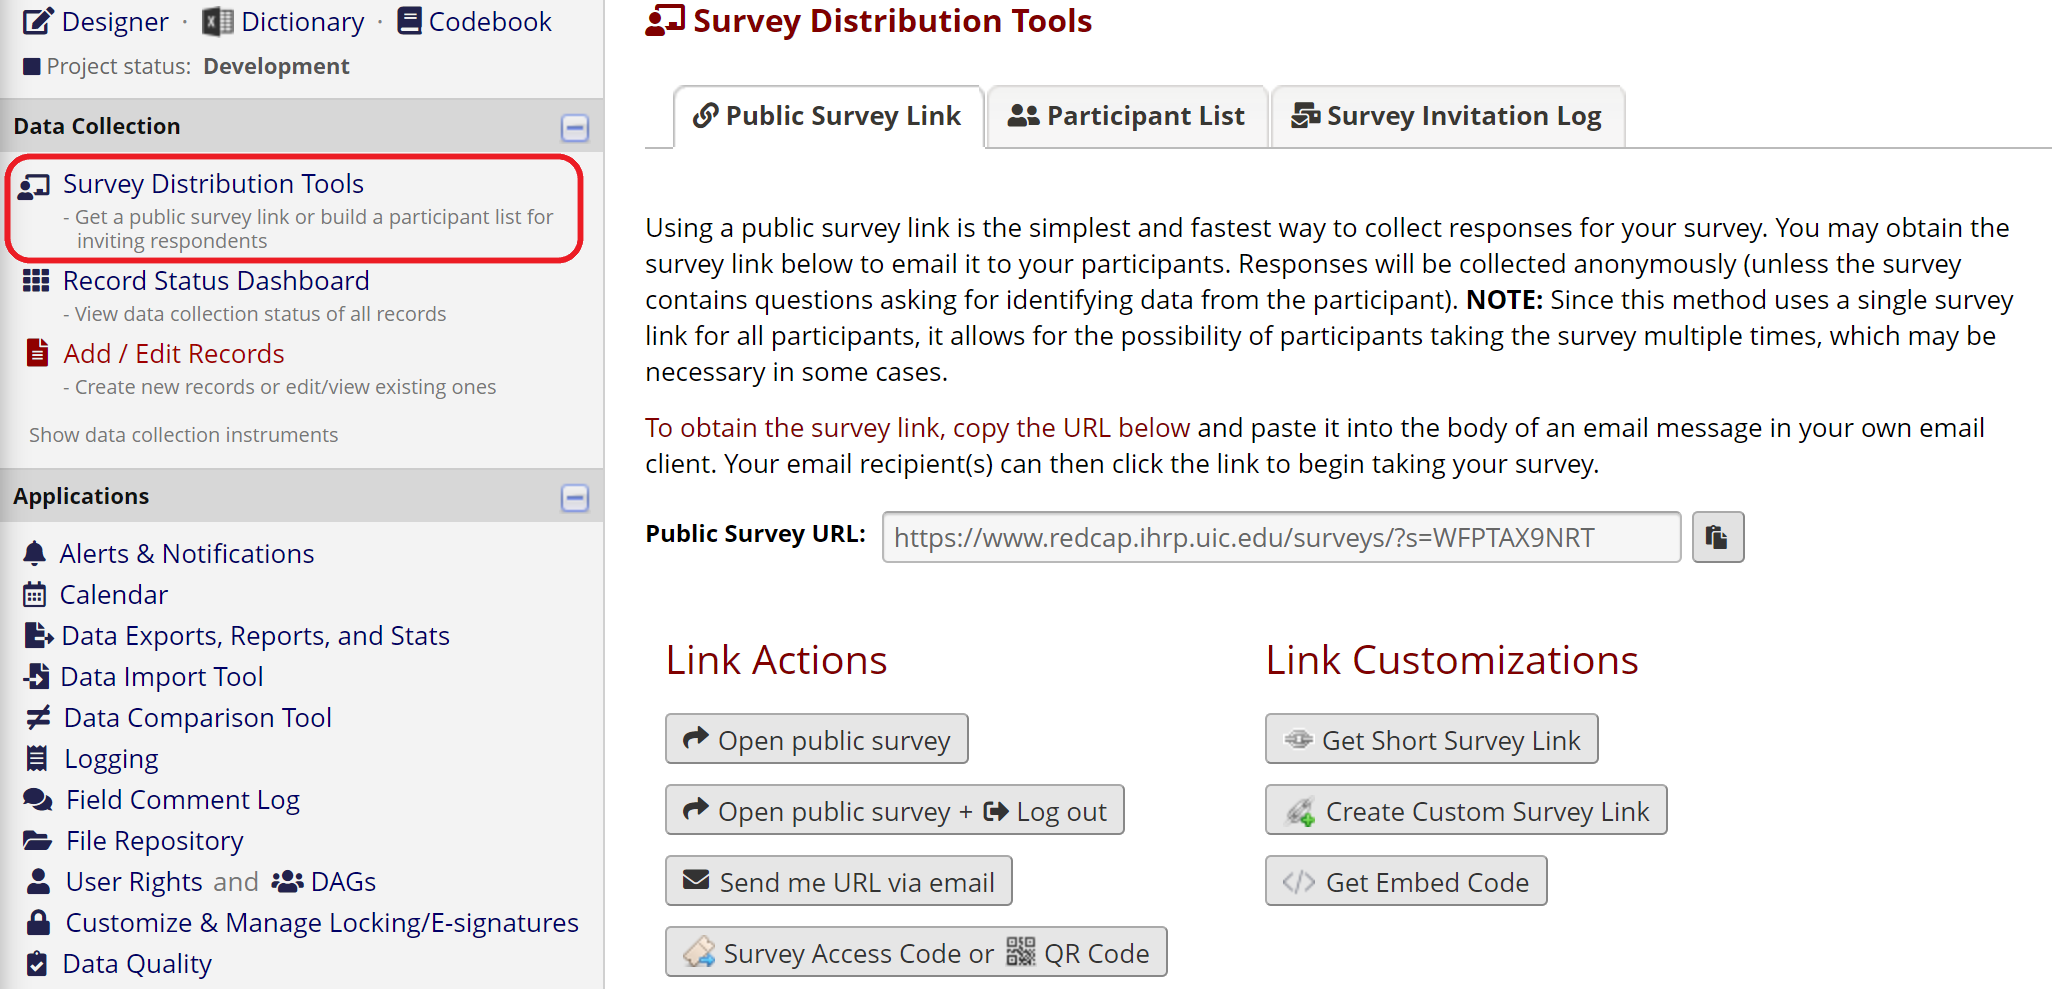
Figure 10: Public Survey Link
When you have individual participants’ email addresses ahead of time, the e-Consent survey can be sent directly to each participant using a unique survey link. Each participant’s response status can be tracked and you can follow up with participants individually based on their linked information.
To use this option, we recommend you start your project with a data entry form where study staff can enter your participants’ information, including email addresses. Then, in Project Setup, enable the option “Designate an email field for communications (including survey invitations and alerts)” in Project Setup.
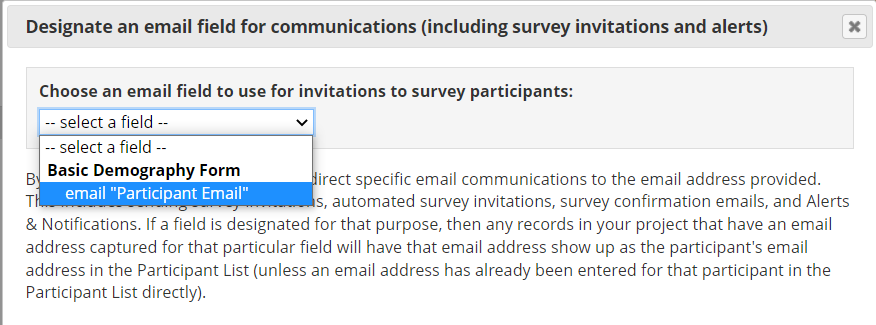
Figure 11: Designate a participant email field
Then open the Participant List in Survey Distribution Tools. Participants’ email addresses will automatically show up. From there, you can send the invitations by clicking “Compose Survey Invitations”. Or, use Automated Invitations to send the consent form automatically after previous instrument is completed.
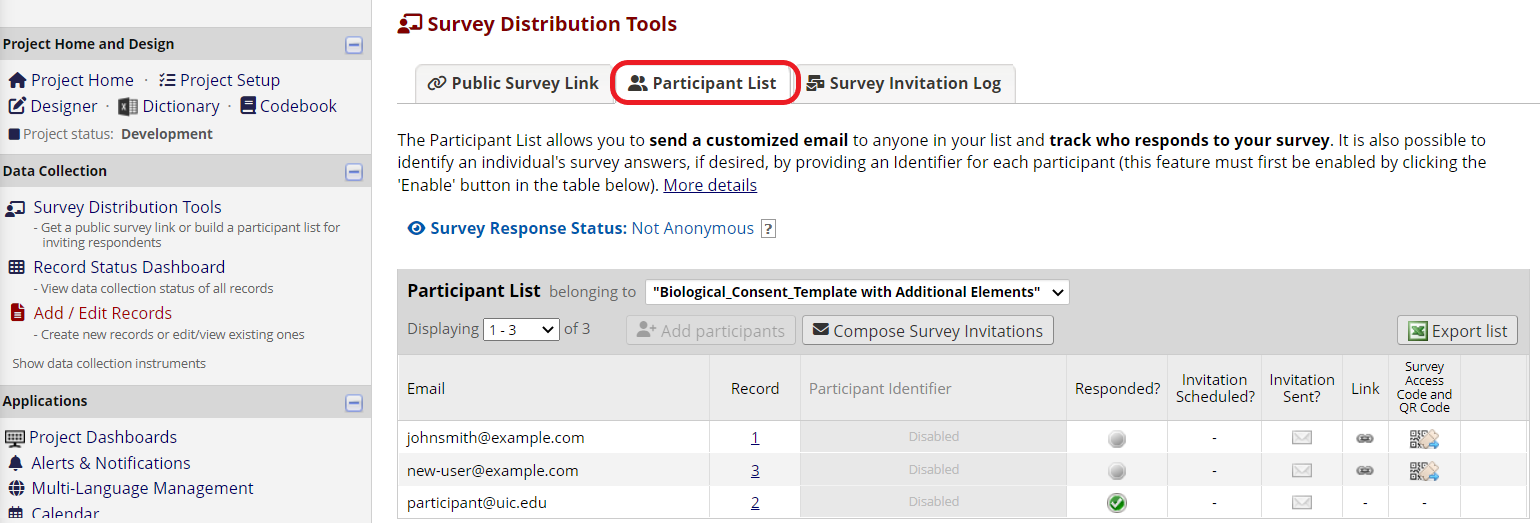
Figure 12: Participant List
When a study participant is unable to complete the consent form alone or doesn’t have an email address available, study staff can open the e-Consent survey form on a study device and let the participant fill it out.
If the consent form is the first instrument in the project and a public survey link exists, follow the “Using a Public Survey Link” instructions above.
Otherwise, study staff should create a new record or open an existing record for the participant and navigate to the e-Consent data entry form linked to that record. Then, click “Open survey” in the Survey options menu. If the menu isn’t visible on the data entry form, first click “Save and Stay” to initialize the e-Consent response.
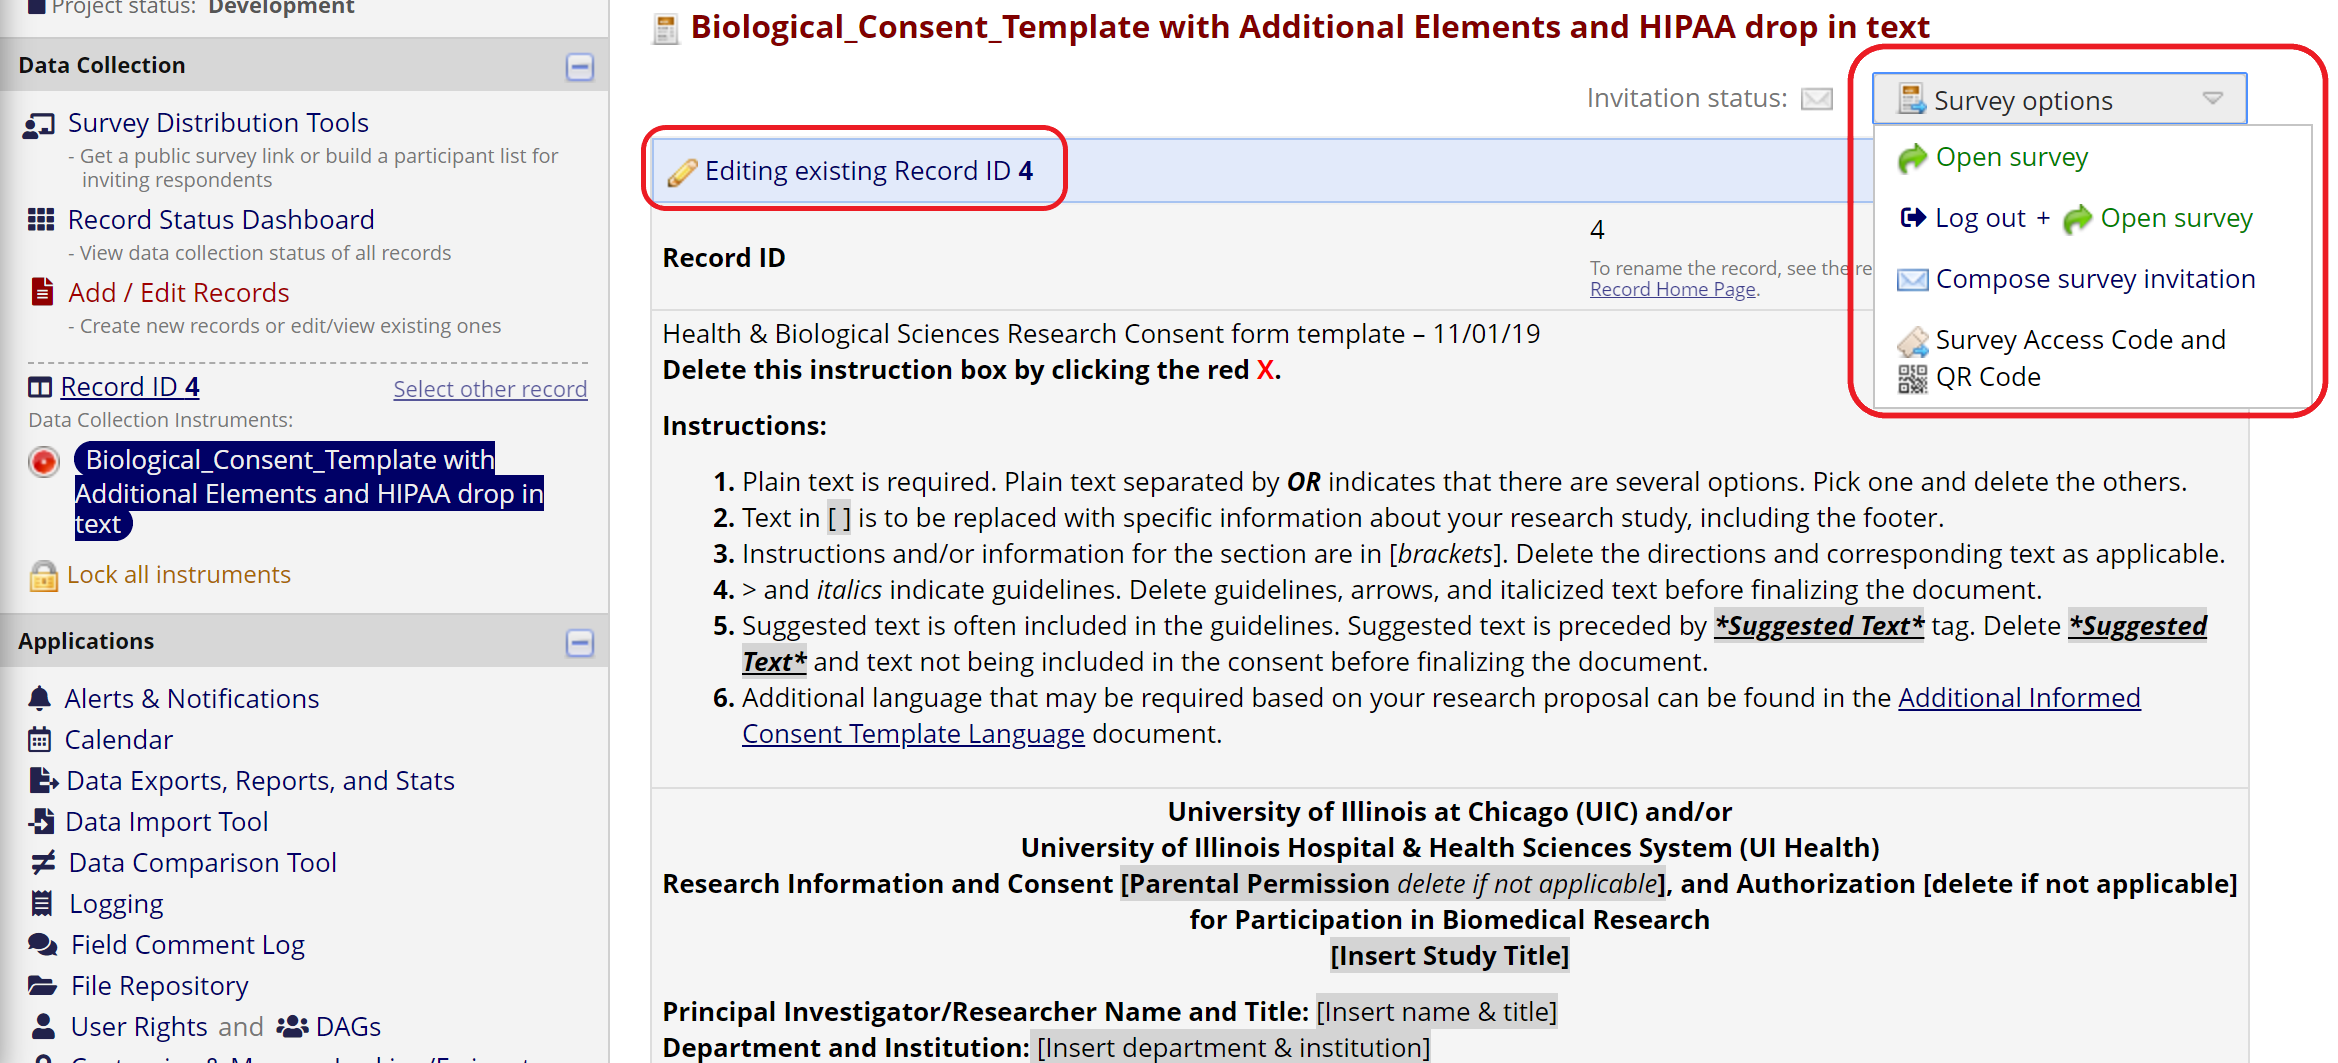
Figure 13: Open survey for an existing record
When the e-Consent framework is in place, participants will be asked to certify their information at the end of the consent form before submitting it. Participants will have the option to download and print their signed consent forms in pdf format. The PDF document include all data entry fields, entered records with the uploaded consent document.
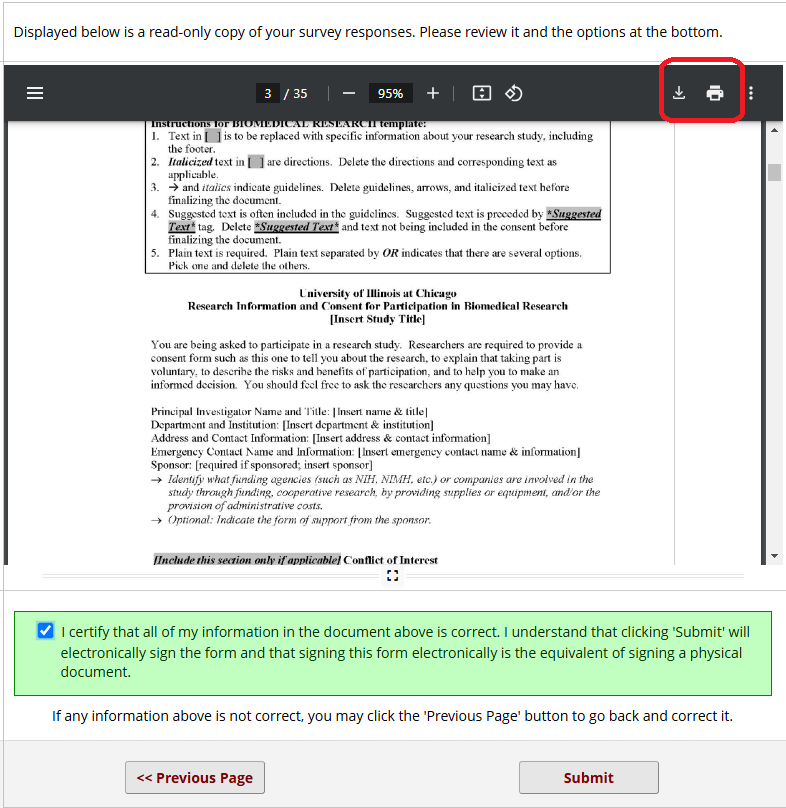
Figure 14: Consent Certification Page