 Biostatistics | Center for Clinical and Translational Science
Copying Projects
Users with Full-Access (Creator or Owner) REDCap accounts can copy the structure, and optionally the data, of an existing REDCap project. If needed, begin by requesting a full-access account.
Users can copy a project or instrument to reproduce some data collection process or to create a backup before making critical changes.
For example, you may need to copy a project or form to:
- Make critical changes to a project in production mode. Modifications to the original project require approval from the REDCap administrator, while changes to the copy can be made in real time.
- Reuse REDCap forms or settings for a new project.
- Split an existing project into multiple separate projects.
- Submit test data to a version of an active project without recording responses as real data.
If the project you want to copy exists on the UIC CCTS REDCap server, you can copy it within REDCap.
Open the existing project that you wish to copy. Navigate to the “Other Functionality” tab. Click Copy the project.

Figure 1: Copy the Project
Set the name and purpose of the new project. Use the checkboxes to indicate whether you want to copy existing data, user roles, reports, and other project settings. Then click Copy Project.

Figure 2: Make a copy
It’s also possible to clone an existing project from any REDCap installation, including servers managed by other institutions, using an XML file.
Open the existing project that you wish to copy. Navigate to the “Other Functionality” tab. Click either Download metadata only (XML) or Download metadata & data (XML), depending on whether you want to include existing records along with the project’s structure. Use the checkboxes to indicate which project settings you want to include in the XML file.
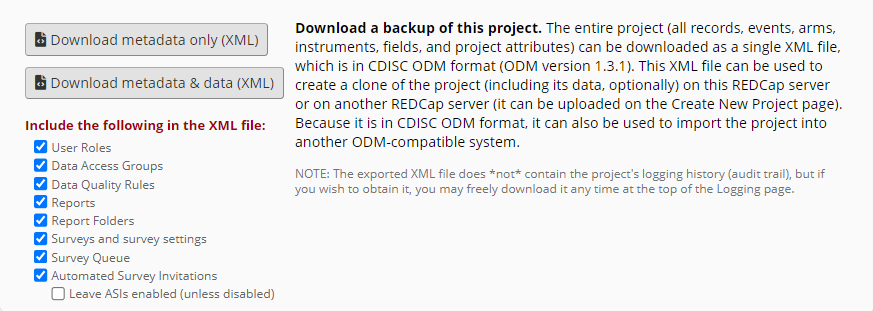
Figure 3: Download XML
From your REDCap home page, click + New Project.

Figure 4: Create a project
Enter the project name and select a purpose. Under “Project creation option:”, select Upload a REDCap project XML file (CDISC ODM format). Click Choose File to choose the XML file you downloaded in the previous step. Then click Create project.
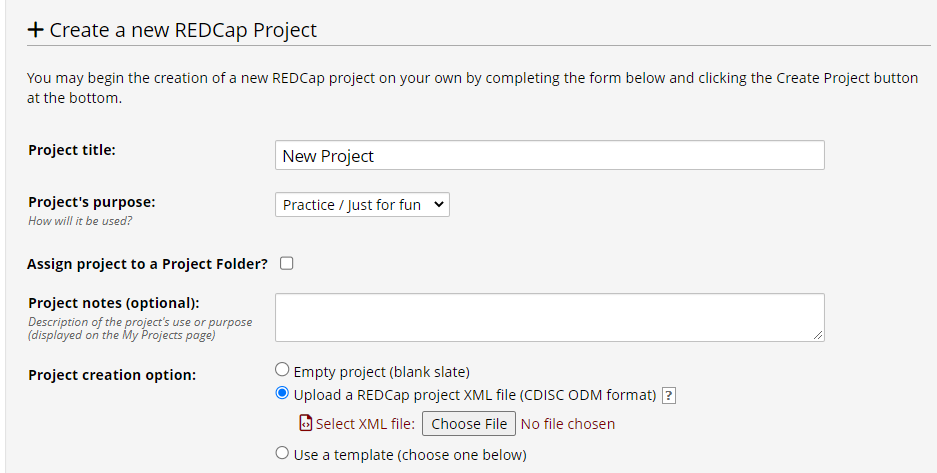
Figure 5: Create from XML
If you don’t need to clone all project settings, you can copy one or more data collection instruments within or between projects.
To recreate an individual data collection instrument, navigate to the Online Designer. Beside the instrument you want to copy, expand the Instrument actions menu and select Download instrument ZIP.
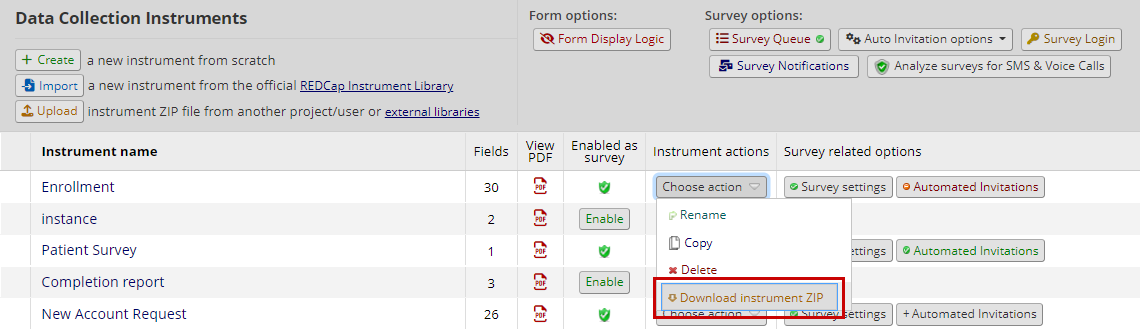
Figure 6: Download the instrument zip
Navigate to the project where you want to add the instrument. Open the Online Designer. Click Upload.
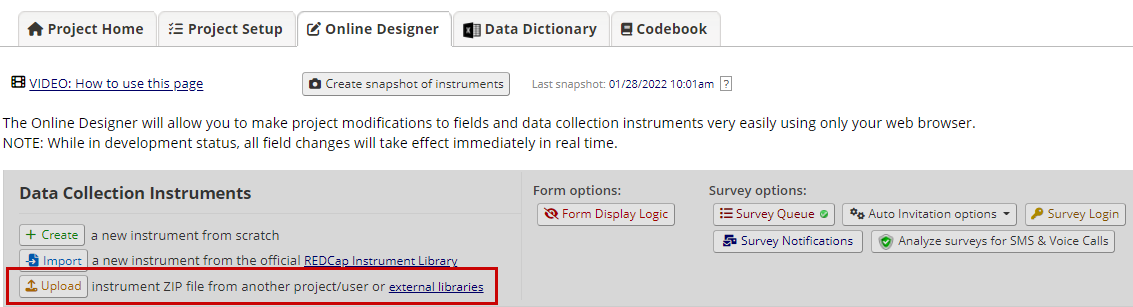
Figure 7: Open the uploader
Choose the ZIP file you downloaded in the last step and click Upload instrument ZIP.
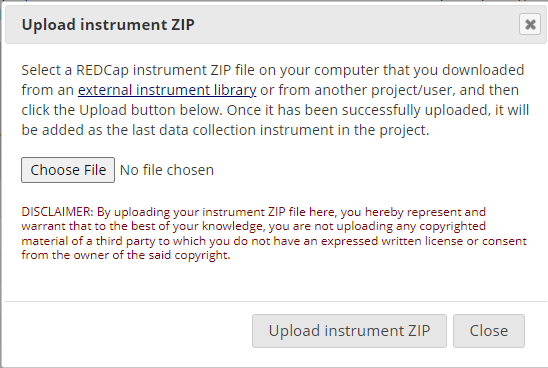
Figure 8: Choose and upload the instrument
If you want to recreate all instruments in a project, you can use the Data Dictionary, a CSV file that defines instruments, fields, and field settings. Remember that the Data Dictionary defines instruments and field, but it does not contain project setup or module information like event definitions, reports, user rights, or randomization schemes.
To download the data dictionary from an existing project, navigate to the Data Dictionary tab. Click the green Download the current Data Dictionary link.
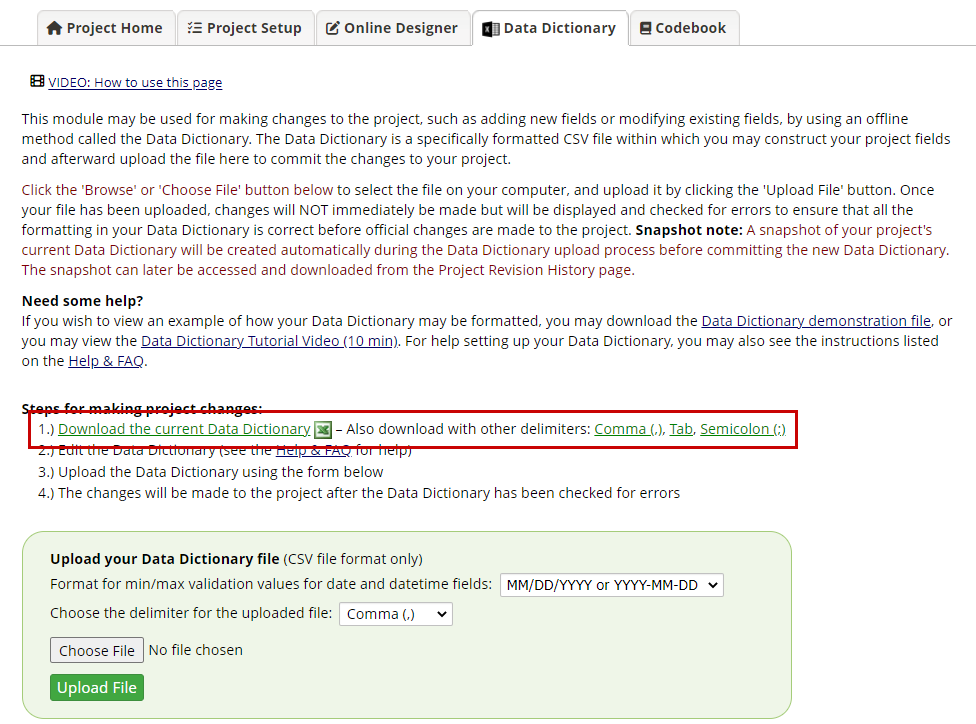
Figure 9: Download the data dictionary
Then open the project where you want to replicate the instruments. Navigate to the Data Dictionary tab. In the green box at the bottom, click Choose File and find the data dictionary you just downloaded. Then click Upload File.
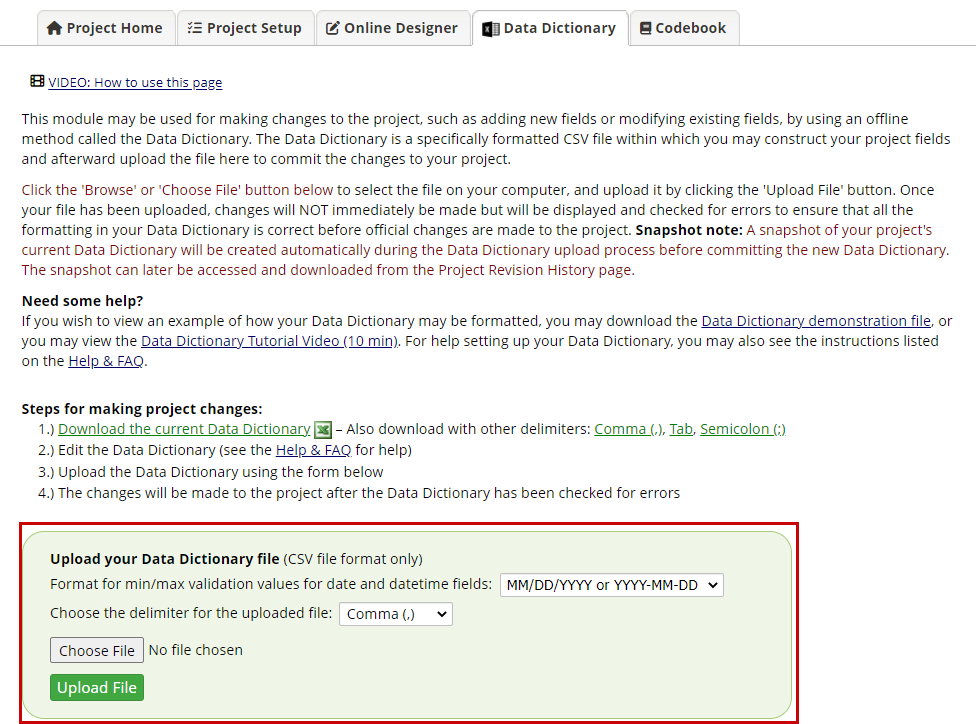
Figure 10: Upload the data dictionary