 Biostatistics | Center for Clinical and Translational Science
Alerts & Notifications
The Alerts & Notifications application allows you to schedule and send customized email messages. The application is similar to Automated Survey Invitations, but it offers more flexibility in scheduling, content, and recipients.
- Alerts can be defined outside the context of inviting someone to take a survey.
- Alerts can be triggered by data entry forms, survey responses, or data imports.
- Messages can be sent to one or more email addresses besides the project- or survey-specific designated email address.
- Alerts can be re-evaluated any time, so you can define alerts based on data that may have already been collected.
Access Alerts & Notifications by clicking the link in the left menu under Applications. Click the green + Add New Alert button.
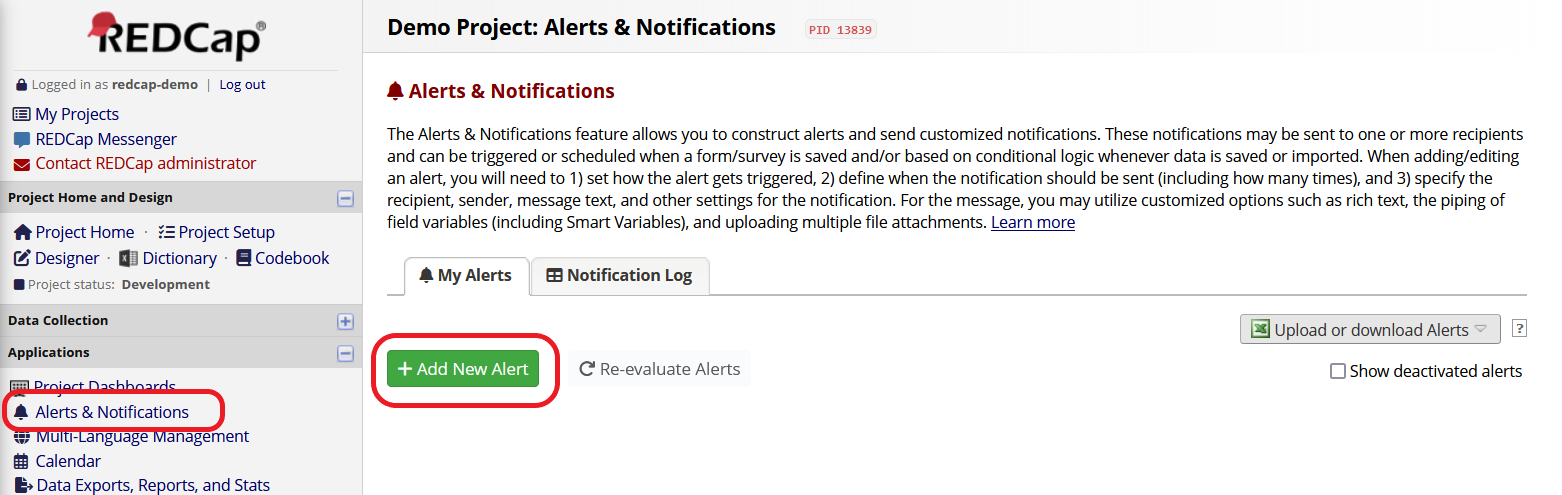
A popup window will appear. Give your alert a descriptive name. Then complete each step below.

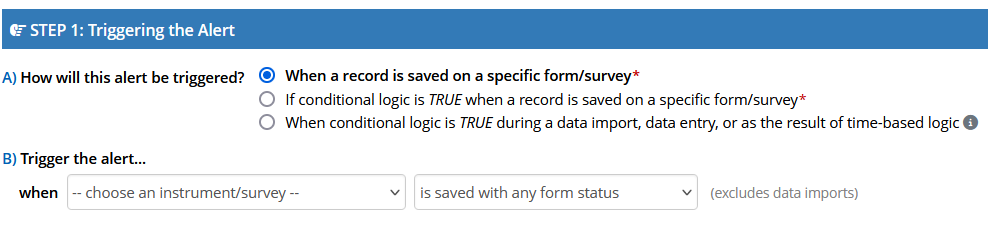
Define what type of condition will trigger the alert.
- When a record is saved on a specific form/survey - This option may apply if you want to send an email when a survey or form response is created or changed. For example, you might want to notify a project coordinator each time an enrollment form is submitted.
- If conditional logic is TRUE when a record is saved on a specific form/survey - This option may apply if you want to send an email when a survey or form response is created or changed, provided some additional condition is met. For example, you might want to notify a clinician about new survey responses, but only for patients associated with her clinic.
- When conditional logic is TRUE during a data import, data entry, or as the result of time-based logic -
Use this option to define fully custom logic. For example, you may wish to trigger an email at a particular date and time using a datediff() function with the
todayandnowvariables. Note that, unlike the previous two options, this type of condition will apply to data imports as well as to survey and form responses.

Indicate which instruments and actions will trigger the alert. Options are specific to the type of condition selected in Part A.
-
If you selected When a record is saved on a specific form/survey, choose the instrument and indicate whether it must be saved with “Complete” status to trigger the alert.
-
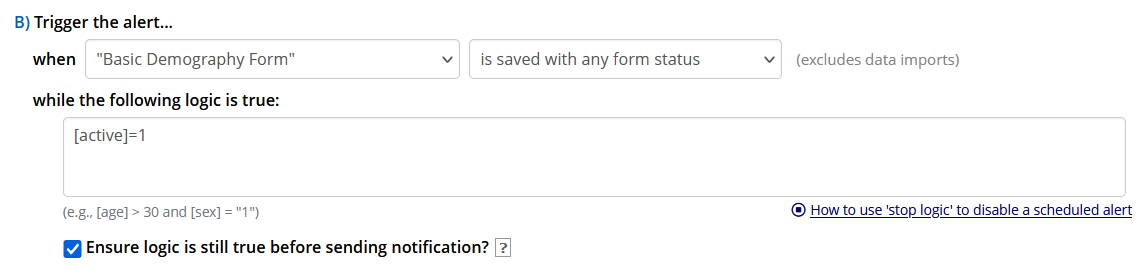
If you selected If conditional logic is TRUE when a record is saved on a specific form/survey, choose the instrument and indicate whether it must be saved with “Complete” status to trigger the alert. Then define additional logic in the “while the following logic is true” box. Design the logic statement so it will evaluate to true or false based on values in each record. See here for some of the special functions you might use as part of your conditional logic.
In some cases, you may wish to cancel the notification if a record changes after the email is scheduled but before it’s sent. To stop a scheduled invitation from going out when the record no longer meets the condition, check “Ensure logic is still true before sending notification?”
-
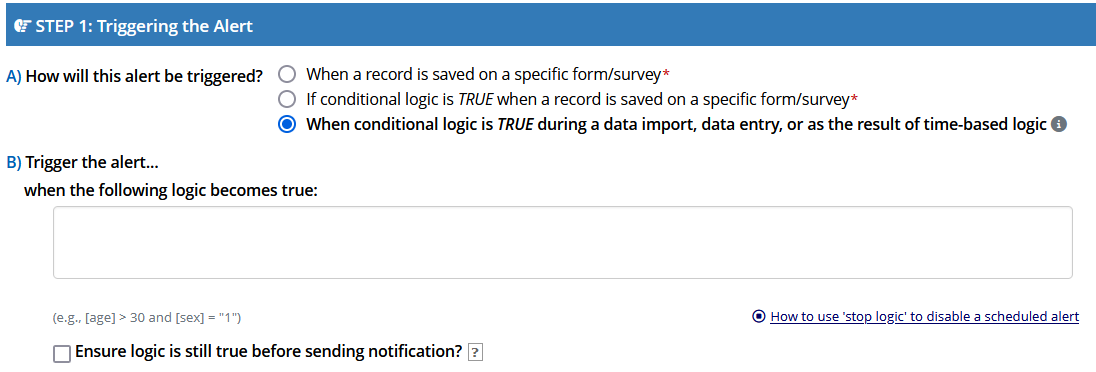
If you selected When conditional logic is TRUE during a data import, data entry, or as the result of time-based logic, define your custom conditional logic in the “when the following logic becomes true” box.
To stop a scheduled invitation from going out when the record no longer meets the condition, check “Ensure logic is still true before sending notification?”
If your trigger instrument is repeating, decide whether you want to send the alert once per record or once per instance.
- Select “only once per record (i.e., never re-trigger)” to send the message a maximum of one time, regardless of how many times the trigger instrument is repeated.
- Select “only once per record and also on every instance of a repeating instrument” to send the message every time a repeating instance of the trigger instrument meets your criteria.

Alerts are scheduled immediately when a record meets the conditions defined in Step 1. However, you can decide whether they are sent immediately or at a later time in Step 2.
Choose whether to send alerts:
- Immediately
- On a specific day of the upcoming week
- After a specific time lag
- At an exact day and time

You can elect to send the message once or multiple times at a set interval.
Tip: To keep sending an invitation repeatedly until a survey is completed, include the survey’s completion status as part of your conditional logic in Step 1. Be sure to check “Ensure logic is still true before sending notification?” Then set the frequency of the recurrence in Step 2.

(Optional) Enter a date after which notifications should be discontinued for all records.

Complete each section to define your message contents and settings. The instructions below demonstrate options for email alerts.
Define the alert type.

Choose a “From” email address. This could be a primary or secondary email address associated with any of your project’s users. Optionally set a “From” display name.

Choose or manually enter email addresses for message recipients. These might include:
- One or more project users.
- One or more email fields from your project. Text fields with “Email” validation will appear in this list.
- One or more manually typed email addresses.

Click “+ Show more options” to add CC, BCC, and email-failure recipients.

Include an email subject.

Compose your message.
- Use the rich text controls to format your message and insert links and images.
- Use piping to personalize the text for each record. For example, you might start your email with the greeting, “Dear [first_name].” See here for more information about piping.
- Smart variables will allow you to include each recipient’s unique survey link in the email. For example, you might include “[survey-link:followup_survey:Click here to complete your survey.]” to inject a link to an instrument called “Followup Survey.” See here for more information about smart variables.

If any fields in your project are designated as identifiers, you can exclude them from email messages by checking “Prevent piping of data for identifier fields.” Instead, piped identifiers will be replaced with “[*DATA REMOVED*]”.
This step can help prevent PHI or PII from being shared through email, which is not a secure form of communication.

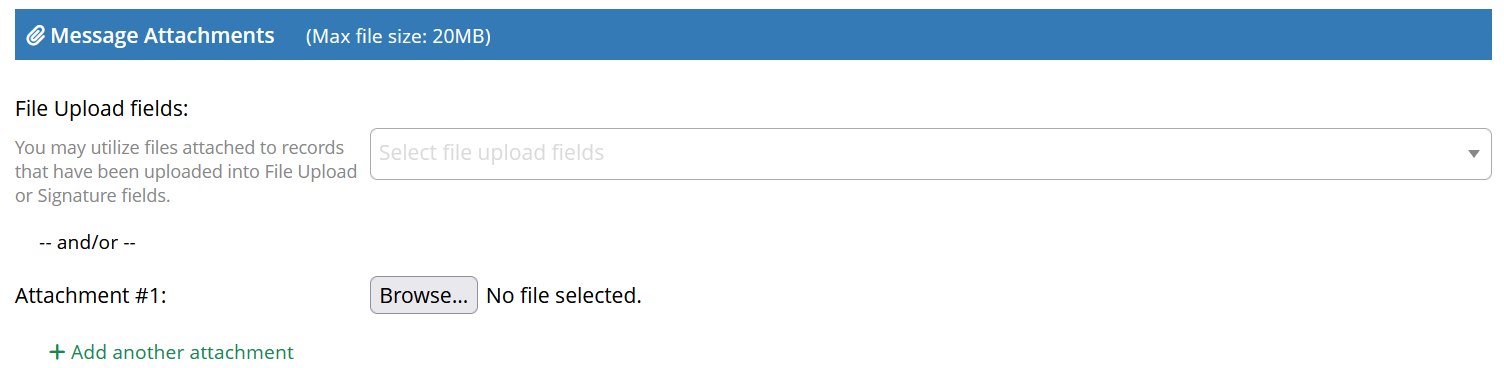
Click Add attachments to attach one or more files to your message.

Attachments might be files you upload from your computer or files from File Upload fields within the project.
Once you have edited your alert’s settings, click Save. You will return to the main Alerts & Notifications page. The alert will be set to active automatically.
On the main Alerts & Notifications page, each active alert will appear with links to edit, copy, or deactivate it.

To see what the message will look like for a particular record, click Preview and select “Preview message by record.”

Select an existing record ID to see what the message will look like with that record’s piped values.

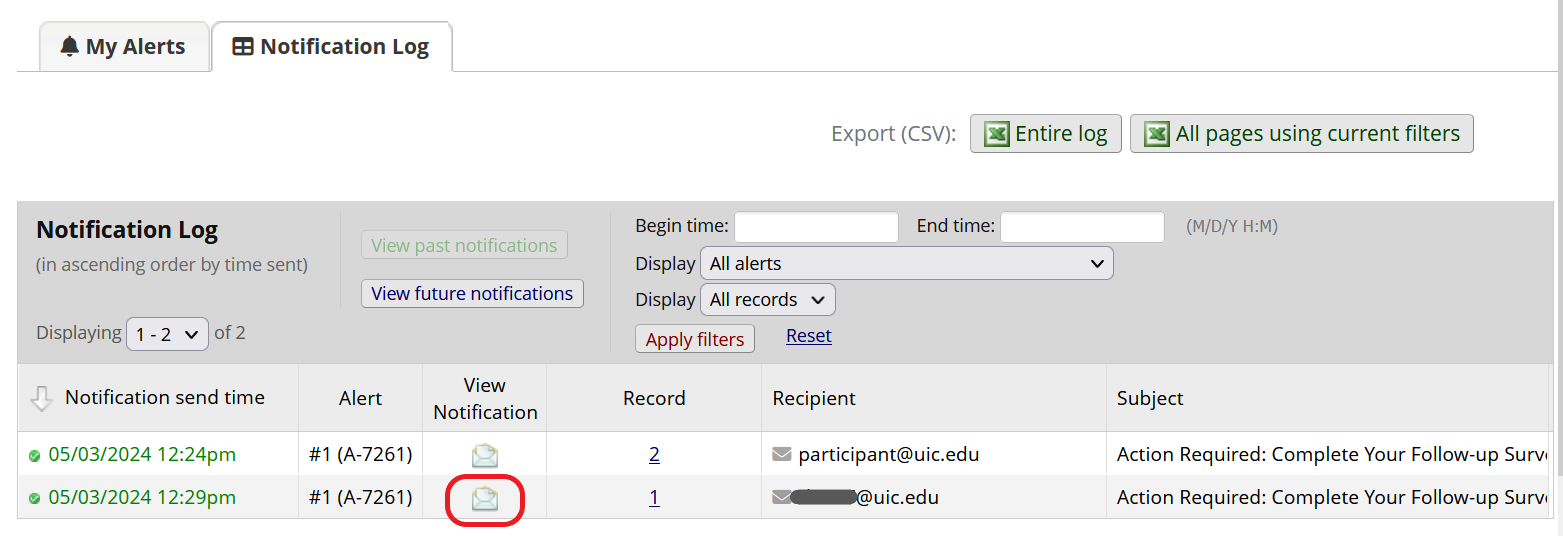
Visit the Notification Log tab to see a record of past and future (scheduled) alerts. Columns include date and time of the alert, the unique alert ID, and the recipient’s email address and record number. Click on the envelope icon to view the contents of a specific alert.
If an alert is defined after data have already been collected in your project, you may wish to re-evaluate the alert for all records. This will allow REDCap to identify existing records that meet the conditions defined in Step 1.
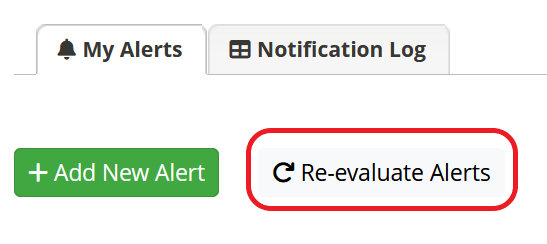
Click Re-evaluate Alerts.
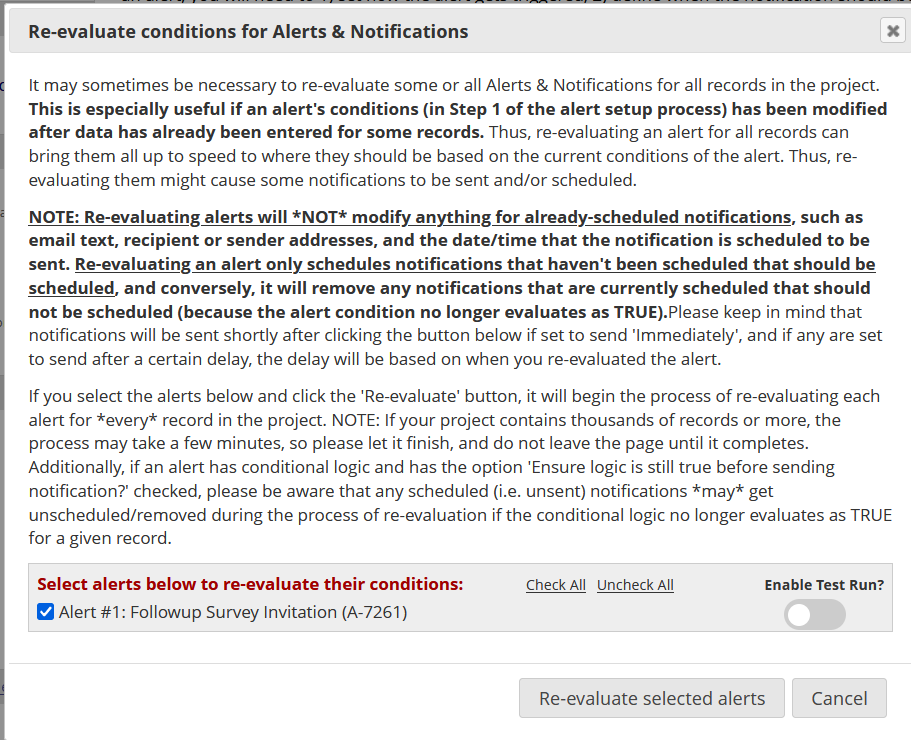
Review the information in the pop-up window and select which alerts you want to evaluate. If desired, toggle Enable Test Run? to preview the results of the re-evaluation before the messages are sent. Then click Re-evaluate selected alerts.
If your project contains multiple events or arms, prepend the unique event name to any piped values or smart variables. For example, your message might include the following link to a baseline questionnaire: [baseline_arm_1][survey-link:patient_questionnaire]
If your alert includes a link to a repeating instrument, refer to a specific instance by appending the instance number to any piped values or smart variables. To include a link to a new instance of a repeating instrument, append [new-instance]. For example, your message might include the following link to start a new weekly check-in survey: [survey-link:check_in_survey][new-instance]
See here for more information about using smart variables to refer to events and instances.