 Biostatistics | Center for Clinical and Translational Science
Practice Workshop
This exercise will lead you through the process of creating and customizing a project in REDCap. Each step will demonstrate one or more core elements of the platform.
This exercise requires a full-access REDCap user account, which allows you to create, copy, and delete projects. If you do not have a full-access user account, you can request one through the REDCap Ticketing System.
At each step, click “View Screenshot” to reveal a screenshot and tips to complete the task. You can also refer to PDF versions of this guide with and without images:
Log in to REDCap.
-
Log in with your username and password.
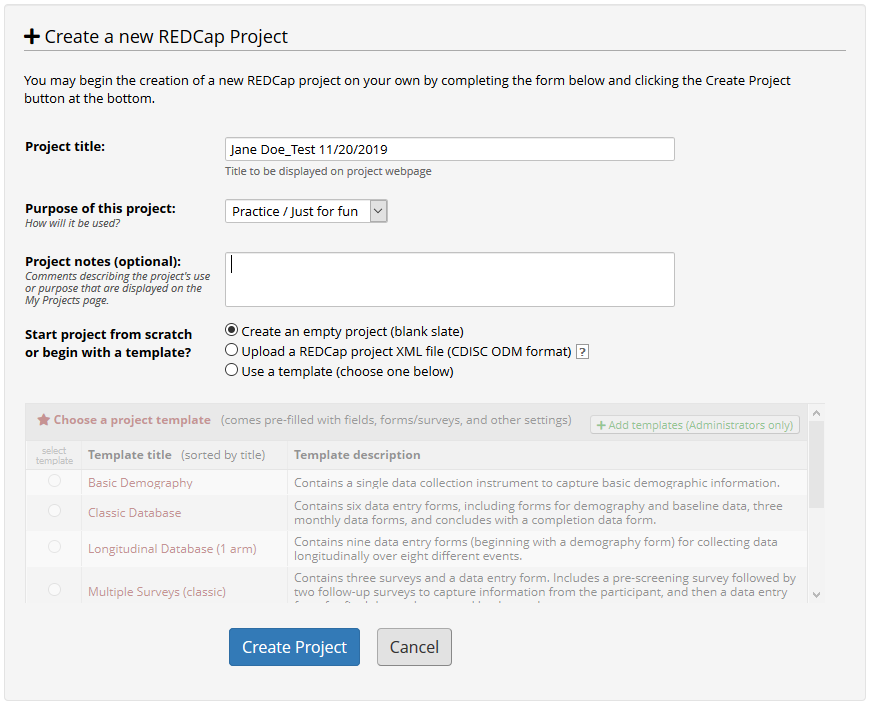
Create a new blank project with title “[your name]_Test [date].” Select “Practice / Just for fun” as the project purpose.
- At the top of the REDCap home screen, click
+ New Project.

- Fill out each project field. Then click
Create Project.
Open the Online Designer to start customizing your project.
- On the left menu under Project Home and Design, click
Project Setup.

- Click
Online Designer.

- Alternatively, click
Designerin the left menu under Project Home and Design.

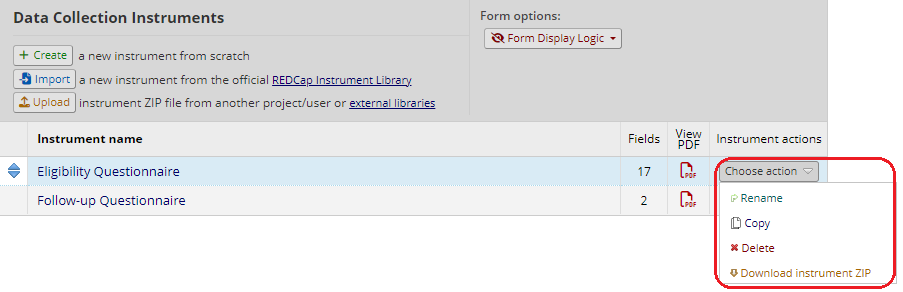
Add two data collection instruments with the following names: Eligibility Questionnaire and Follow-up Questionnaire.
- Open the Online Designer.
- To create each instrument, click
+ Create. Then click+ Add instrument here.

- Type the instrument name and click
Create.

- To copy or rename an existing instrument, use the menu under Instrument actions.
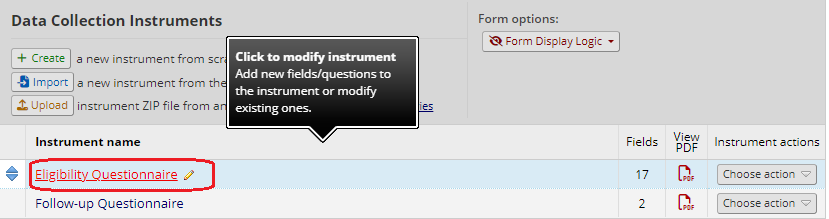
Build each form using the field names, field types, and validation rules listed in the tables at the end of this document.
- To open an instrument for editing, click its name.
- Click
Add Fieldin the desired location.
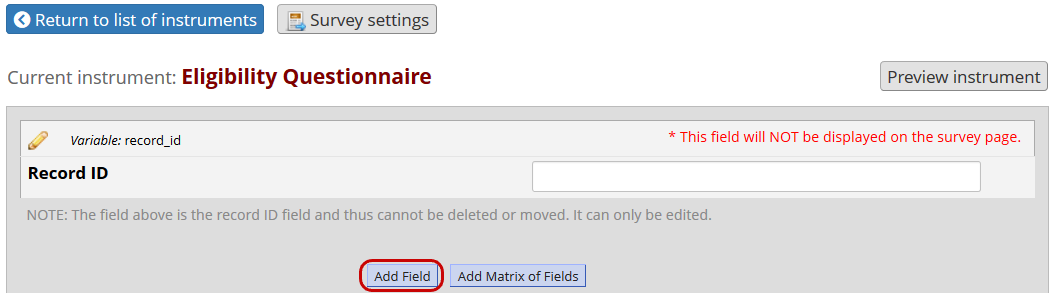
- Select a field type from the dropdown menu. Review and set each field attribute. Then click
Save.

Create a new record.
- Click on
Add / Edit Records.

- Click
+ Add new record.

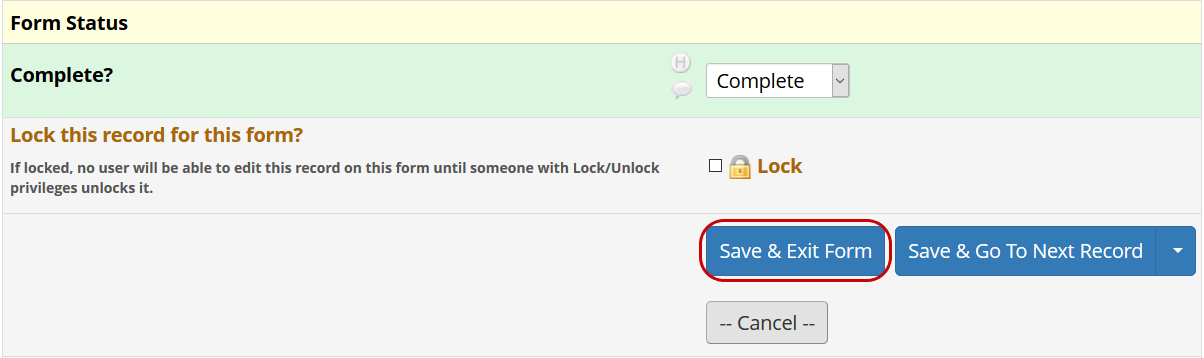
Enter data to test each form.
- Try to enter nonsensical data to test the validation rules of each field. You will receive an error message if any of the branching logic or calculated fields were not set up correctly.

- When you have tested all fields on a form, click
Save & Exit Form.
Open an existing respondent’s record home page.
- Click on
Add / Edit Records.
- Choose or search for a record by ID or instrument response(s).

Open an instance of a partial or complete response to view the data.
- Click a status icon to view the corresponding response data. The icon color indicates the data entry status.
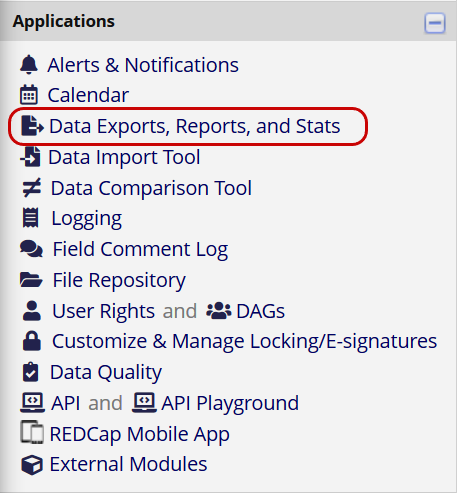
Export project data in the “CSV / Microsoft Excel (raw data)” format.
- In the left menu under Applications, click
Data Exports, Reports, and Stats.
- Click
Export Data.

- Review the possible formats, de-identification options, and advanced data formatting options. Choose the “CSV/Microsoft Excel (raw data)” format. Then click
Export Data.

Enable longitudinal data collection for this project.
- Open Project Setup.
- Under “Main project settings,” beside “Use longitudinal data collection with defined events?”, click
Enable.

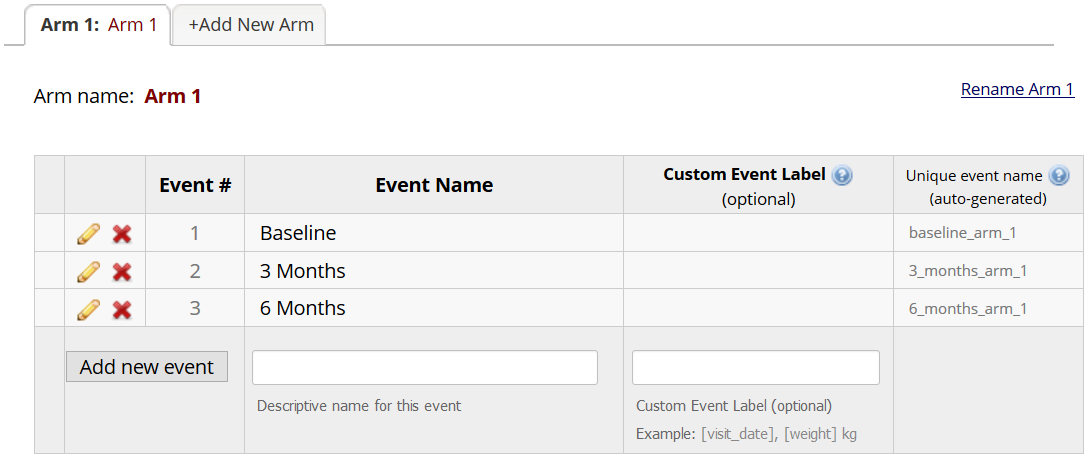
Create three events with the following names: Baseline, 3 Months, and 6 Months.
- On the Project Setup tab, click
Define My Events.

- Enter each event’s name and click
Add new event.
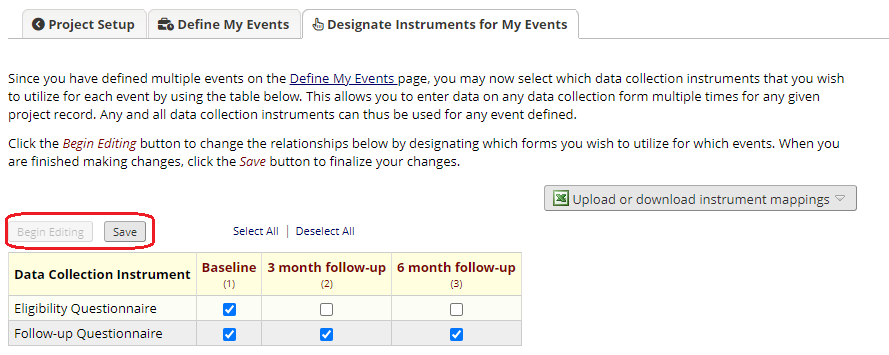
Designate instruments for each event so you can collect eligibility data once and follow-up data at each timepoint. Link the Eligibility Questionnaire to the baseline event only. Link the Follow-up Questionnaire to all three events.
- On the Project Setup tab, click
Designate Instruments for My Events.

- Click
Begin Editing. Check the appropriate boxes beside each data collection instrument. Then clickSave.
Add a new record and observe the changes to the instrument structure.
- Create a new record.
- Notice how the instrument structure now allows longitudinal data collection.

Enable surveys in this project.
- Open Project Setup.
- Click
Enablebeside “Use survey in this project?”

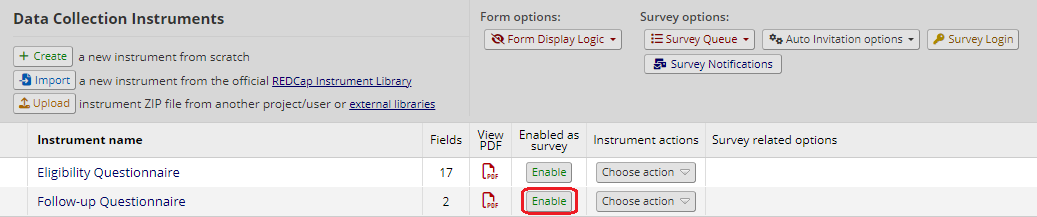
Enable the second instrument (Follow-up Questionnaire) as a survey.
- Open the Online Designer.
- Beside the second instrument, click
Enable. A “Set Up My Survey” tab will open.
Allow users to save their progress and return later.
- In the Survey Access section of the setup page, select
Yesbeside “Allow ‘Save & Return Later’ option for respondents?”

Open an existing record. View the second instrument as a survey.
- Open an existing respondent’s record home page.
- Click a status icon to view the corresponding response data.
- Under Survey options, click on
Open Survey.

Note: REDCap allows use of a public survey URL for anonymous surveys. The URL becomes available when the first instrument of a project is enabled as a survey. You can create a shorter, more memorable version of your survey link by clicking Create Custom Survey Link.

For this exercise, you cannot use the public URL because the first instrument is not set up as survey. Instead, you must add individual participants’ email addresses via the Survey Distribution Tool.
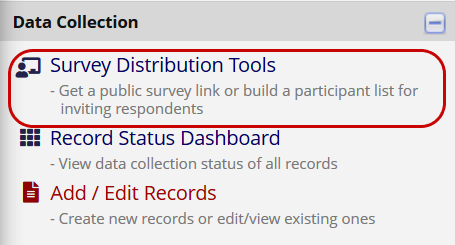
Using a personal email address, add yourself as a participant.
- In the left menu under Data Collection, click on
Survey Distribution Tools.
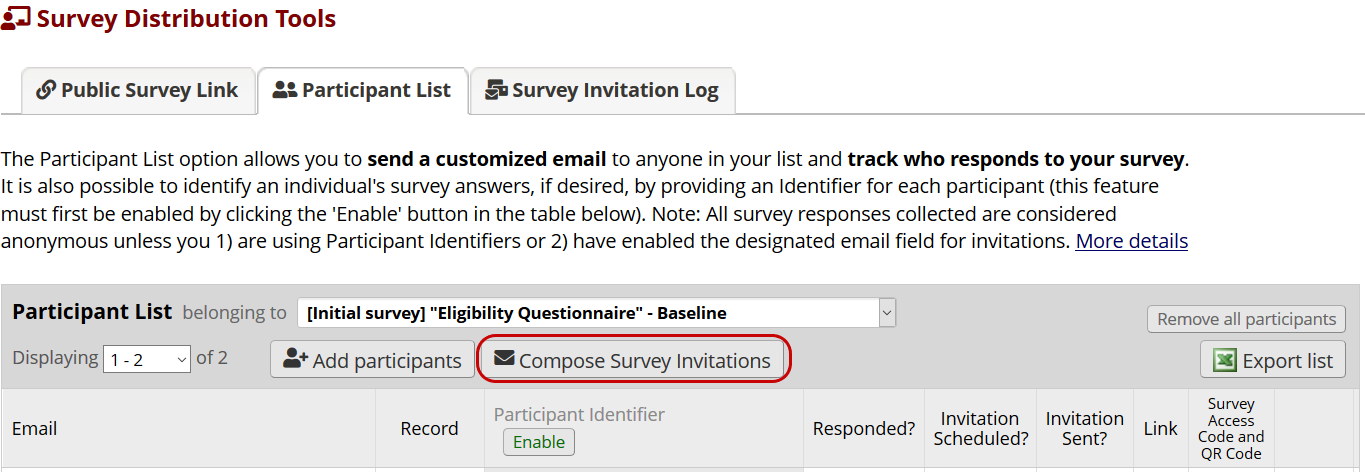
- On the “Participant List” tab, click
Add participants.

- Enter one or more email addresses and click
Add participants.

Invite yourself to complete the survey. You will receive an invitation email from REDCap.
- At the top of the Participant List, click
Compose Survey Invitations.
- Edit the text in the “Compose” box and review the message settings. Make sure your personal email is selected in the Participant List. Click
Send Invitations.

- Check your email account for the invitation email. Follow the link in the email to complete the survey.
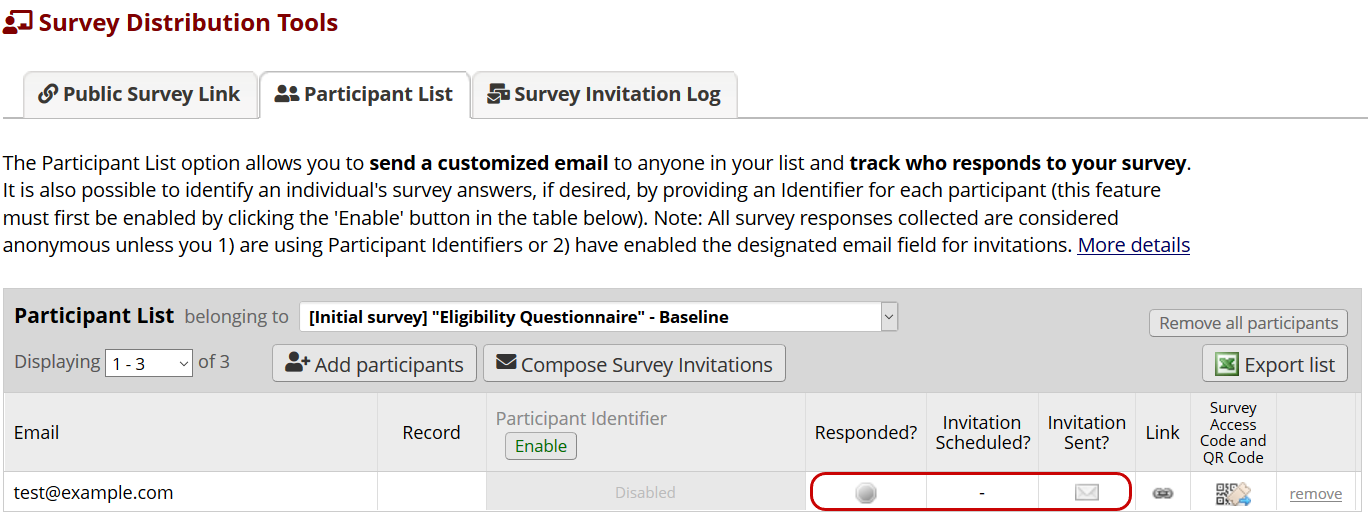
Check the response status of invited participants.
- Click on
Survey Distribution Tools.
- View each participant’s status on the “Participant List” tab.
After project instruments have been created and tested, the project should be moved to production status. Note that, once a project is in production, a REDCap administrator will need to approve any further edits.
If changes do not cause any critical issues for existing data, they should be approved automatically. You will receive an email notification when changes have been approved.
Other changes, like changing field options or deleting a field, may cause critical issues for existing data. This kind of change will not be approved automatically while in production status. Instead, a REDCap administrator will contact you via email to confirm the revision. This process takes up to one business day.
Initiate the move to production status. Keep all records that were created while in development status.
- Open Project Setup.
- At the bottom of the page, click
Move project to production.

- Read the notice and click
I Agree.

- Select
Keep ALL data saved so far.ClickYES, Move to Production Status.

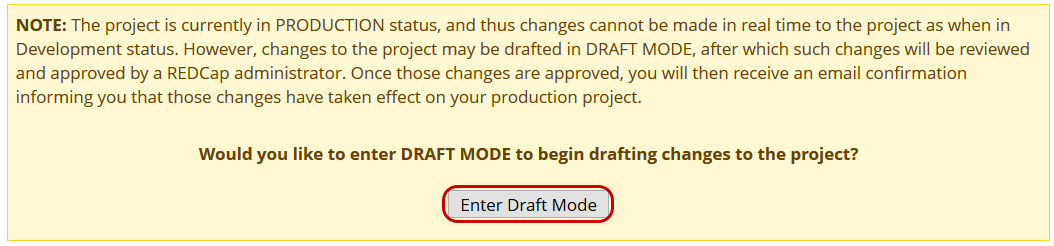
Enter draft mode.
- Open the Online Designer.
- Read the notice and then click
Enter Draft Mode.
Add a field to a data collection instrument. Submit the changes for review by a REDCap administrator.
-
Open one of the existing instruments and add a new field.
-
Click
Submit Changes for Review.

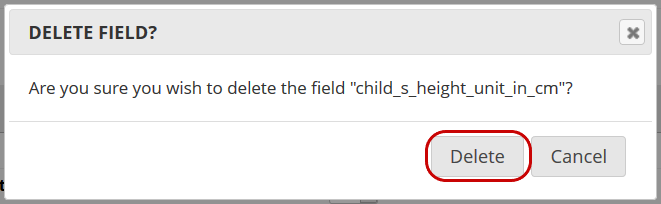
Delete a field from one of the forms.
-
Open one of the existing instruments for editing.
-
Delete a field by clicking the red
Xabove the field name.

- Confirm by clicking
Delete.
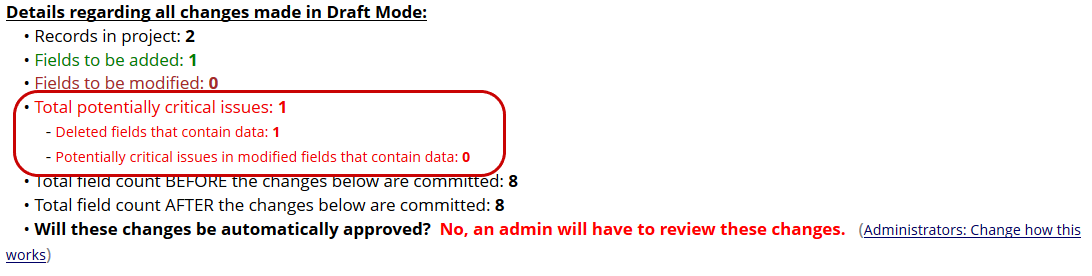
View the draft changes without submitting.
- Click
View detailed summary of all drafted changes.

- Notice the potentially critical issues that will occur if this field is deleted.
Make a duplicate of the current project named “[your name]_Test [date]_v2.”
- On the left menu under Project Home and Design, click
Project Home.

- Click on the “Other Functionality” tab.

- Click
Copy the project.

- Edit the project name. Review other options without making changes. Click
Copy Project.

Note the structure and status of the duplicate project.
-
Open the “Other Functionality” tab.
-
The new project should be an exact copy of the original. However, the new project is still in development status, regardless of the status of the original.

Initiate deletion of the project.
-
Open the “Other Functionality” tab.
-
Click
Delete the project.

Use the fields in the tables below to create the two data collection instruments:
For guidance on creating each question, see see below.
| Field | Field Type | Notes |
|---|---|---|
| 1. Record ID | Text Box | Validation: “Integer” |
| 2. Child’s First Name | Text Box | |
| 3. Child’s Last Name | Text Box | |
| 4. Parent’s Email | Text Box | Validation: “Email” |
| 5. Screening Date | Text Box | Validation: “Date (M-D-Y)” |
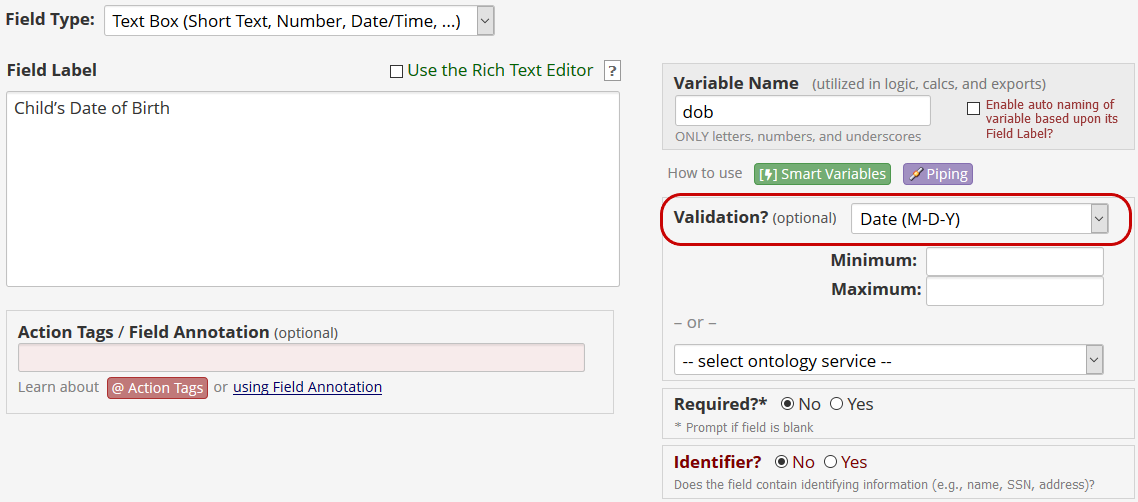
| 6. Child’s Date of Birth | Text Box | Validation: “Date (M-D-Y)” |
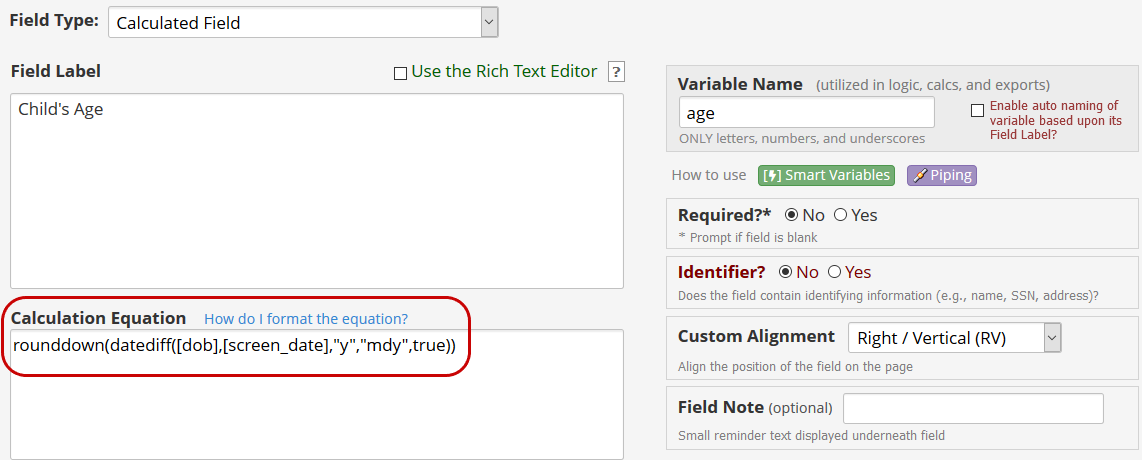
| 7. Child’s Age | Calculated Field | Write an equation that calculates the child’s age from Screening Date and Child’s Date of Birth. |
| 8. English Fluency (Understood/Spoken) | Yes-No | |
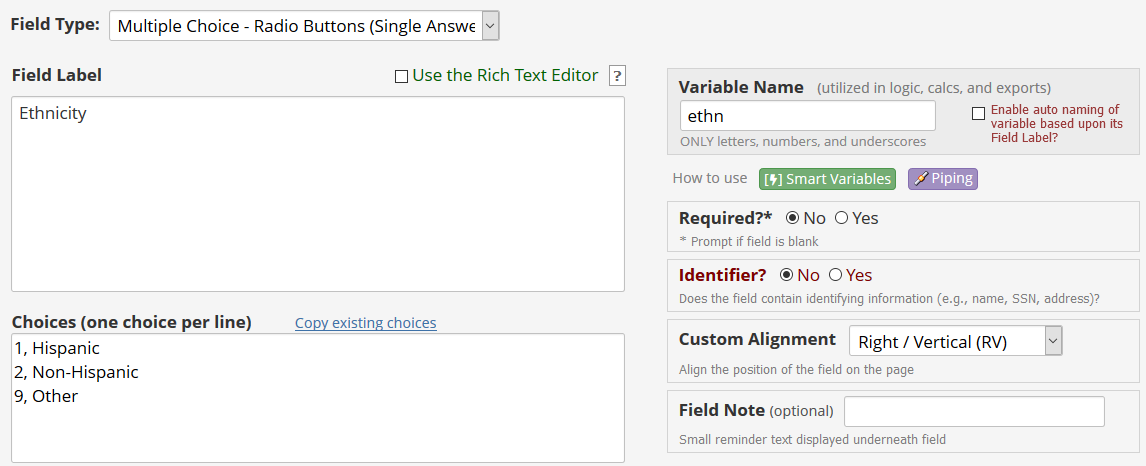
| 9. Ethnicity | Multiple Choice - Radio Buttons (Single Answer) | Options: 1) Hispanic; 2) Non-Hispanic; 9) Other |
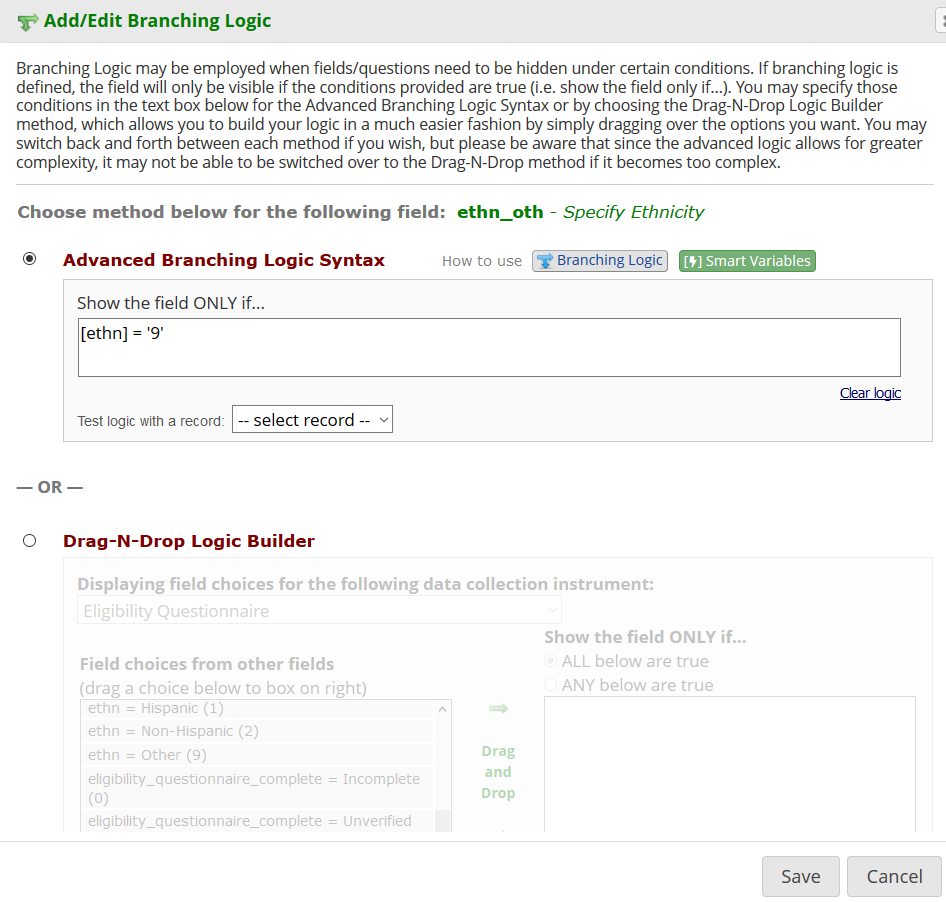
| 10. Specify Ethnicity | Text Box | Use branching logic to make this field available when Ethnicity = “Other” |
| 11. Child’s Height (unit in cm) | Text Box | Validation: “Number” |
| 12. Child’s Weight (unit in kg) | Text Box | Validation: “Integer” |
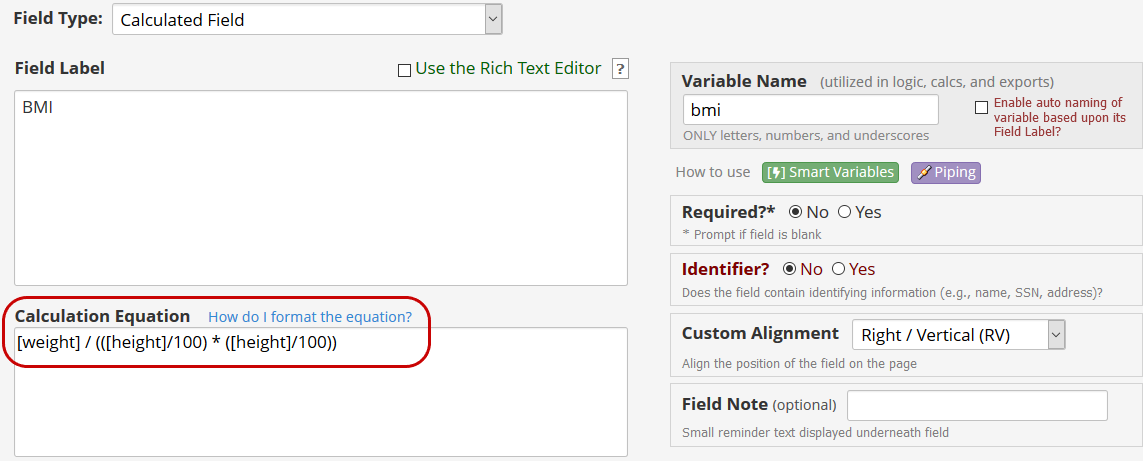
| 13. BMI | Calculated Field | Write an equation that calculates BMI from Child’s Height and Child’s Weight. |
| 14. Are you the parent or legal guardian of [Child’s First Name]? | Multiple Choice - Radio Buttons (Single Answer) | Options: 1) Yes; 0) No (Ineligible). Use piping to display Child’s First Name in the question text. |
| 15. Sorry, you’re not eligible. | Descriptive Text | Use branching logic to show this text when ineligible answers are selected for questions 14. |
| 16. Thanks. You’re eligible to participate in our research study. | Descriptive Text | Use branching logic to show this text when eligible answers are selected for questions 14. Use HTML to make text larger and in the color red (e.g., text!) |
Each field will need a variable name. We highly recommend that you create a short variable name for each field, rather than allowing auto-naming, as shorter names will be easier to use in branching logic, piping, and exported datasets.

If any field contains identifying information such as name, SSN, or address, mark it as an identifier.

If any field contains identifying information such as name, SSN, or address, mark it as an identifier.

Select “Email” as the validation option.

Select “Date (M-D-Y)” as the validation option.

Select “Date (M-D-Y)” as the validation option.
This field can be calculated with an equation of the form
rounddown(datediff([dob],[screen_date],"y","mdy",true)).
Be sure to use the correct variable names for date of birth and screening date.
For more information about calculated fields, click ‘How do I format the equation?’
Define this question with the built-in Yes-No field type.

Each choice must consist of a numeric code, a comma separator (“,”), and a text label.
Use branching logic to make this field available when Ethnicity = “Other.”
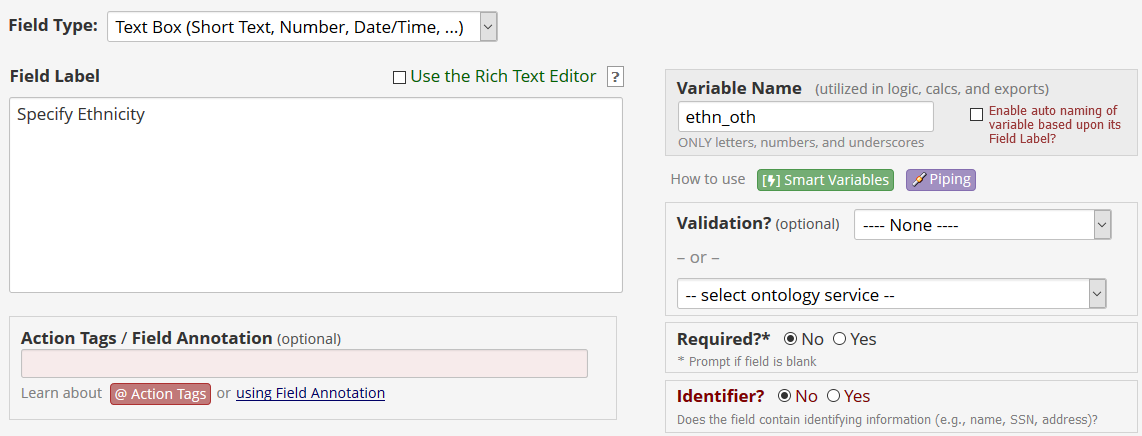
- To define branching logic, click the green arrows above the question text.

- Define branching logic by entering the syntax manually or using the Drag-N-Drop Logic Builder. The logic should ensure the field is only visible when the Ethnicity variable (‘ethn’) is equal to ‘Other’ (coded as 9).
Select ‘Number’ as the validation option.

Select ‘Integer’ as the validation option.

This field can be calculated with an equation of the form
[weight] / (([height]/100) * ([height]/100)).
Be sure to use the correct variable names for weight and height.
Use piping and the variable name (firstname) to reference the text entered
in the Child’s First Name field.
For more information about piping, click the purple Piping button.
Note that the “Yes-No” field type would also work for this question.

Use branching logic to display this text if the question 14 was answered No.


- Use branching logic to display this text only when question 14 is answered Yes.

- You can use HTML syntax or the Rich Text Editor to change font size, color, and formatting.


| Field | Field Type | Response Options |
|---|---|---|
| 1. Please check the symptoms your child has had for the last three months [Check all that apply] | Checkboxes(Multiple Answers) | 1, Fever 2, Head-ache 3, Sneezing 4, Coughing 5, Vomiting |
| 2. How often did you feel overwhelmed or depressed by your child’s symptoms? | Radio-buttons(Single Answer) | 4, Almost always 3, Quite often 2, Sometimes 1, Rarely or Never |
Allow users to select multiple options.
Note that exported data will include an auto-generated dummy variable
for each checkbox option. Branching logic based on checkboxes
takes the form [symptom_child(1)]='1'.

Allow users to select only one option. Assign option codes that match your needs during analysis. In the example, a larger number corresponds to a more negative emotional status.
